Lyft and Uber’s destination filters can be an excellent tool for drivers – if you know how to use them. Senior RSG contributor Jay Cradeur outlines his top strategies for effectively using Lyft’s destination filter, known as destination mode, below.
Lyft keeps making changes to their programs, many of which I’ve been critical of. Earlier this year we saw our per mileage rates reduced. This year we have seen a new pay structure tested out in many markets that has had a further 10% reduction in driver pay.
Then there is the Destination Filter. Lyft recently completed a re-engineering of this valuable feature. The bad news is the number of destination filter uses was cut from six to two per day. On the positive side, the remaining two uses are more valuable to drivers.
In this article, I will present three strategies you can incorporate into your day to get the most out of the Destination Filters.

Lyft Calls It Destination Mode
Even though the tool filters rides for us, Lyft calls the feature Destination Mode. In my head, it will always be the Destination Filter, however, for accuracy’s sake, I will call it Destination Mode for the balance of this article. When we look at the Lyft website, we can glean valuable information from which we will develop the three strategies.
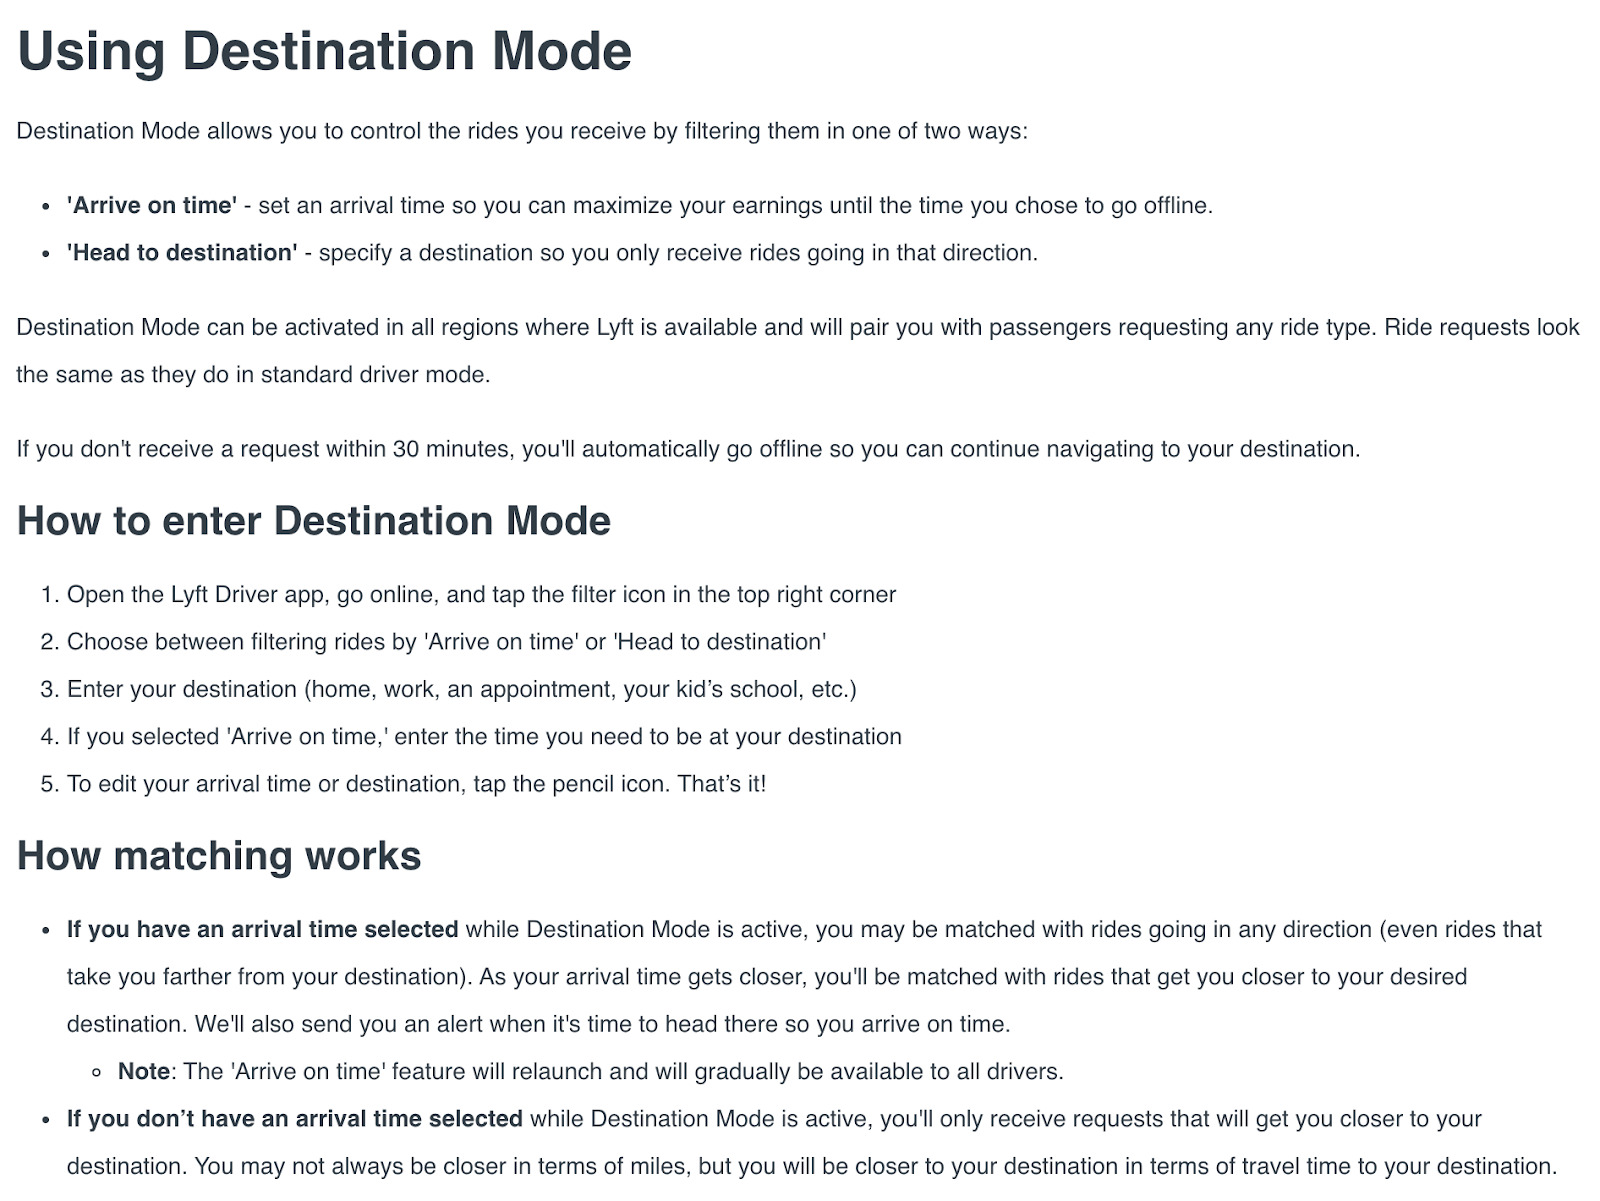
Two Modes From Which To Choose
You will notice there are now two modes. I did not even realize this was the case until I began researching this article. In my app, Lyft defaults to the “Arrive on time” option. Let’s take a look at the destination mode home screen where you will make your choice:
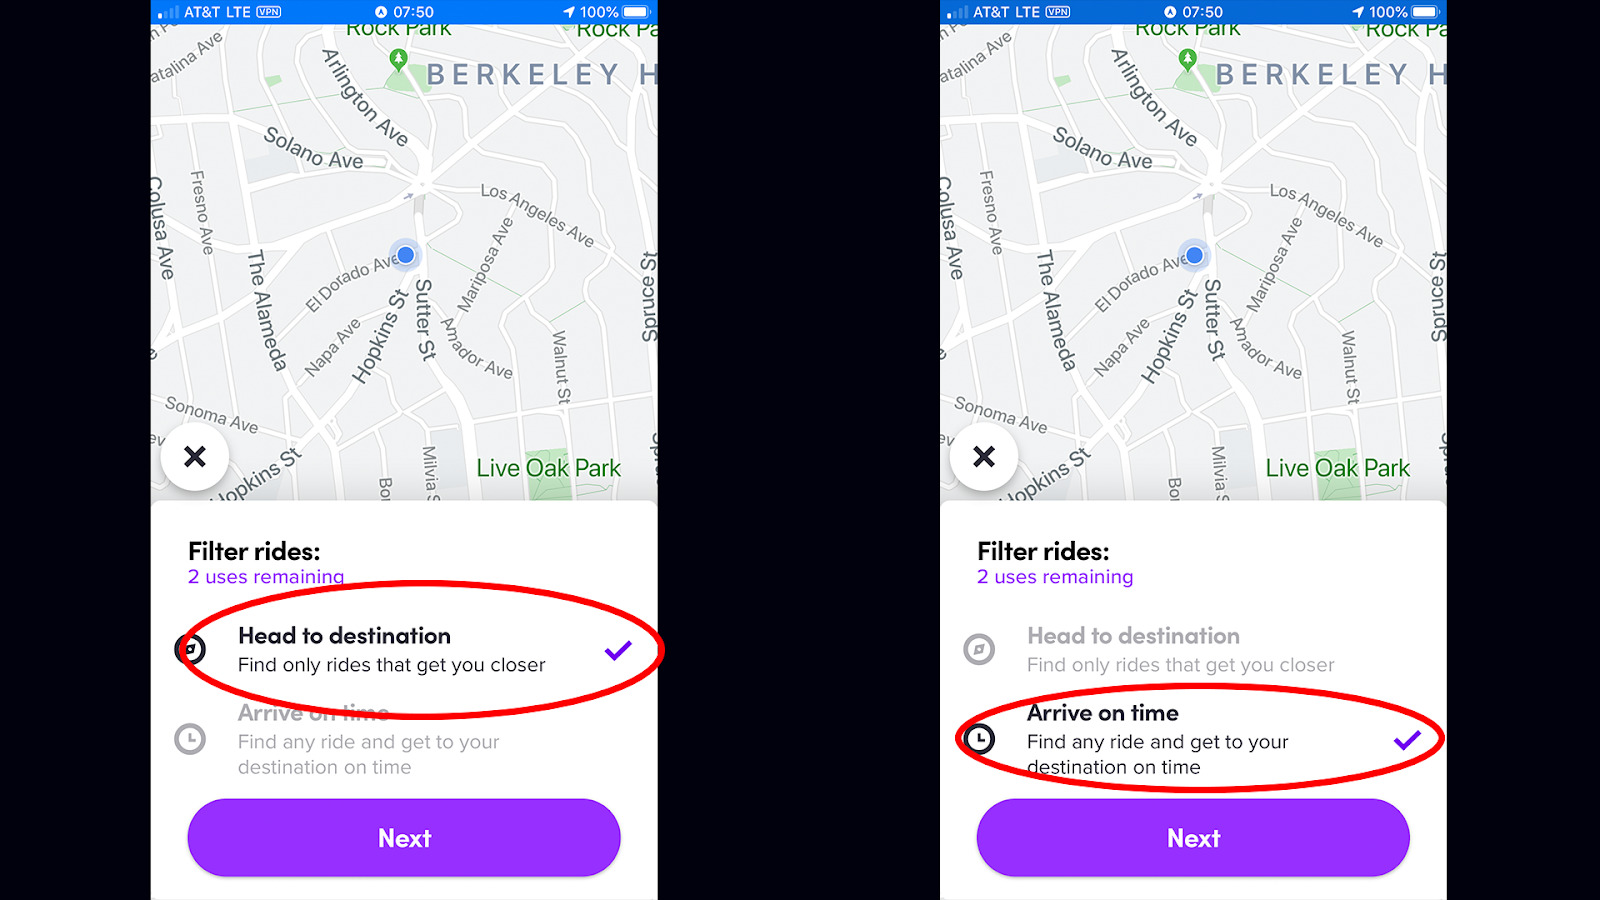
The first screenshot shows you the traditional destination filter. This option will only give you rides that get you closer (by time) to your destination. The second screenshot shows you the new “Arrive on time” option which gives you rides, always allowing you enough time to drive to your destination by your set deadline. Now let’s jump into the strategies.
Strategy #1 – Use The “Arrive On Time” Option To End Your Shift
In the good old days, the destination filter was a simple tool. When you needed to go home at the end of your shift, you would set your destination filter to home and then drive toward home. If Uber or Lyft found a ride that would move you closer to your destination, you would get a ping, pick up your passenger, drop off your passenger, and then continue toward home.
Now Lyft has augmented this process by adding a time element, guaranteeing you that you will arrive home by your specified time.
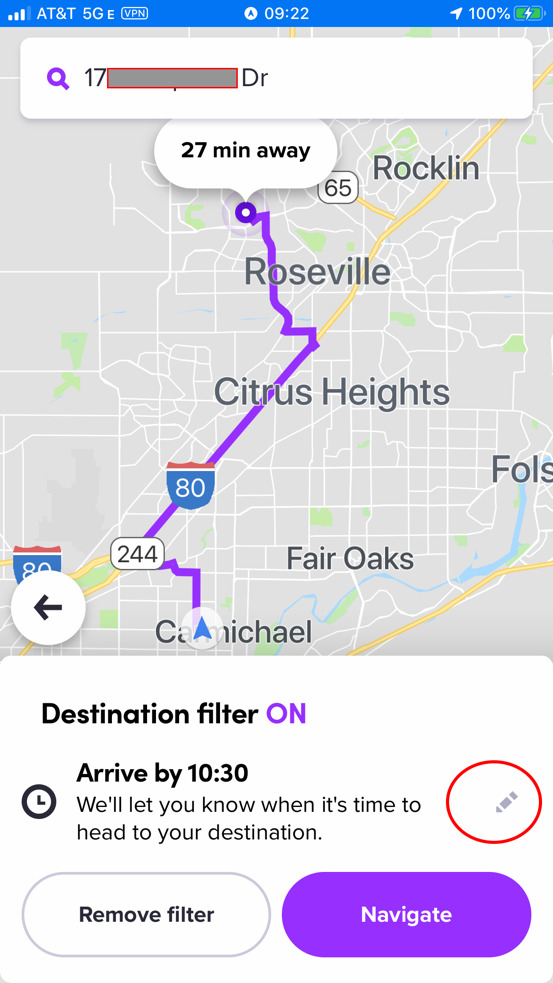
Once you set your destination mode, your home screen will show you your settings. In this case, the time was 9:22 AM when I set the filter and I was ready to head home. The destination filter defaulted to an arrival time of 10:30 AM. We can see that the ride to home is 27 minutes in duration. Therefore Lyft has an extra half an hour or so to find me some rides and allow me to arrive at home by 10:30.
If you want to change the arrival time, you can click on the pencil icon (in red ellipse above) and you will be taken to this screen:
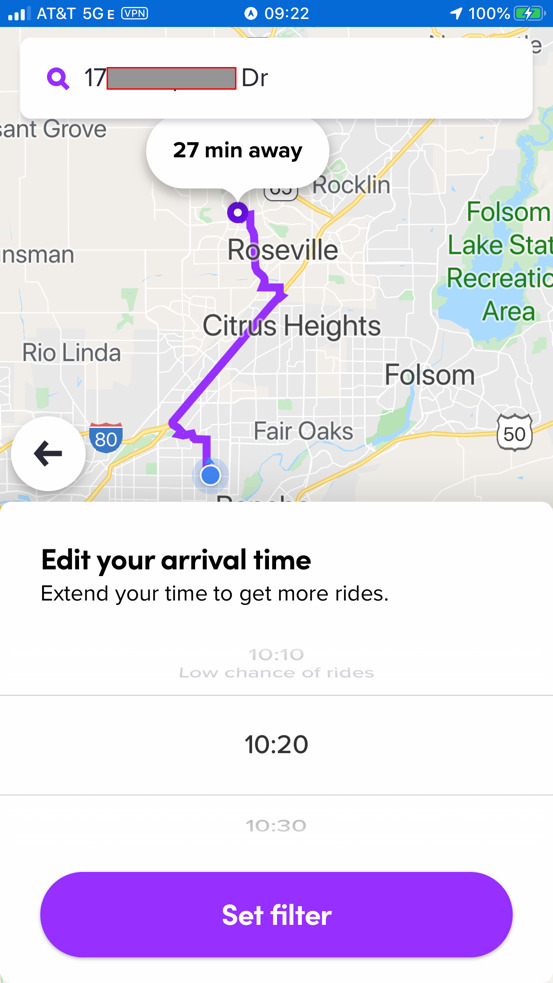
Here you can change the arrival time by swiping up or down. Let’s say, for example, you really want to get one more ride in before you end your shift. Well, then you can delay your arrival time and give yourself a better chance of getting a ride.
In this example, I could change the time to 11:50 AM, adding over an hour, to ensure a better chance of getting a ride.
One thing that is very different about this destination filter is you will not always get rides that move you closer (in time or distance) to your destination. I found this out one day when I was heading home.
I gave myself 90 minutes to return home. My destination filter was all set. I then got a ride that took me 20 minutes in the opposite direction. I did not understand how I could be taken in the wrong direction. However, once I made the drop-off, I still had 70 minutes to get back home which was now 40 minutes away.
The lesson here is that as long as a ride leaves you with enough time to get to your final destination by your selected arrival time, you will get that ride.
Typically, I now use the Destination Mode at the end of the day with about one hour to go on my shift. I usually get one or two rides on the way home. One thing I like about this new destination filter is I always know I will be home by a specified time.
Strategy #2 – Use Your “Head To Destination” Option To Secure Long Rides
This is the old strategy to earn long rides, rack up the freeway miles, and increase your per hour earnings. This strategy allows me to craft long rides heading toward a major city.
The real negative about Lyft’s recent changes is the shift from 6 uses to 2 uses. Consequently, if you use one use for the end of your shift, you will only have one remaining use to procure long rides. Here again is another reason to have Uber in your back pocket as you will have an additional two Destination Mode uses with Uber, for a total of four.
Strategy #3 – Choose And Use Your Destination Mode Uses Wisely
Since you only get two uses, do not waste them. I made a classic blunder last Saturday and used one of my Destination Mode uses without securing a ride. I was in the East Bay, in Oakland, and I wanted to go back to San Francisco. I set the Destination Mode to the Cliff House and set the timer for one hour Once I set it, I began to drive toward San Francisco and soon got on the Bay Bridge. I then realized I had no more use for the filter. Once I got to San Francisco, I was willing to accept any ride.
My mistake was not allowing enough time for the app to find me a ride from Oakland to San Francisco. The lesson here is if you are going to set arrival time, set ample time to get a ride in addition to the drive time. In my case, I allowed only 10 extra minutes on top of the drive time. The net result was I wasted half of my Destination Mode uses for the day and had only one left to use at the end of my shift. I then got stranded out in Marin County and had to deadhead back into San Francisco. That mistake likely cost me a $20 – $40 ride back into San Francisco.
Key Takeaways for Using Lyft’s Destination Mode
The only thing that is constant is change. Here we see a change that has both positives and negatives.
It is positive that we have a new time element feature. The negative is the reduction in the number of uses.
However, if you integrate these three strategies, you will find that your driving day if far more manageable. While I am not happy to only have two uses, I do like knowing that I will be home at the same time each day. Be safe out there.
Drivers, how do you use Lyft’s destination mode in your city?
-Jay @ RSG