While there are no guarantees of staying 100% safe while driving during a pandemic, wearing your mask and using a barrier or shield in your rideshare vehicle definitely improves your odds. We had senior RSG contributor Gabe Ets-Hokin try a variety of vehicle partitions and shields to see which ones fit the best, provided the best barrier, and were relatively affordable.
Remember the good ol’ days? When a passenger would wheeze and cough like a character from a David Lynch film, we would just grimly keep driving, maybe stopping to offer a lozenge if it got too grating?
Now, if you heard coughing from your passenger you’d probably stop the car, get out and start running. If you’re driving during this pandemic, you probably want a shield. I’ll break down some of the top options below.
Related:
- The Best Masks for Rideshare Drivers: Our In-Depth Review
- 5 Ways Drivers Are Creating Their Own Sneeze Guards and Protective Barriers
What is a Shield or Driver Partition?
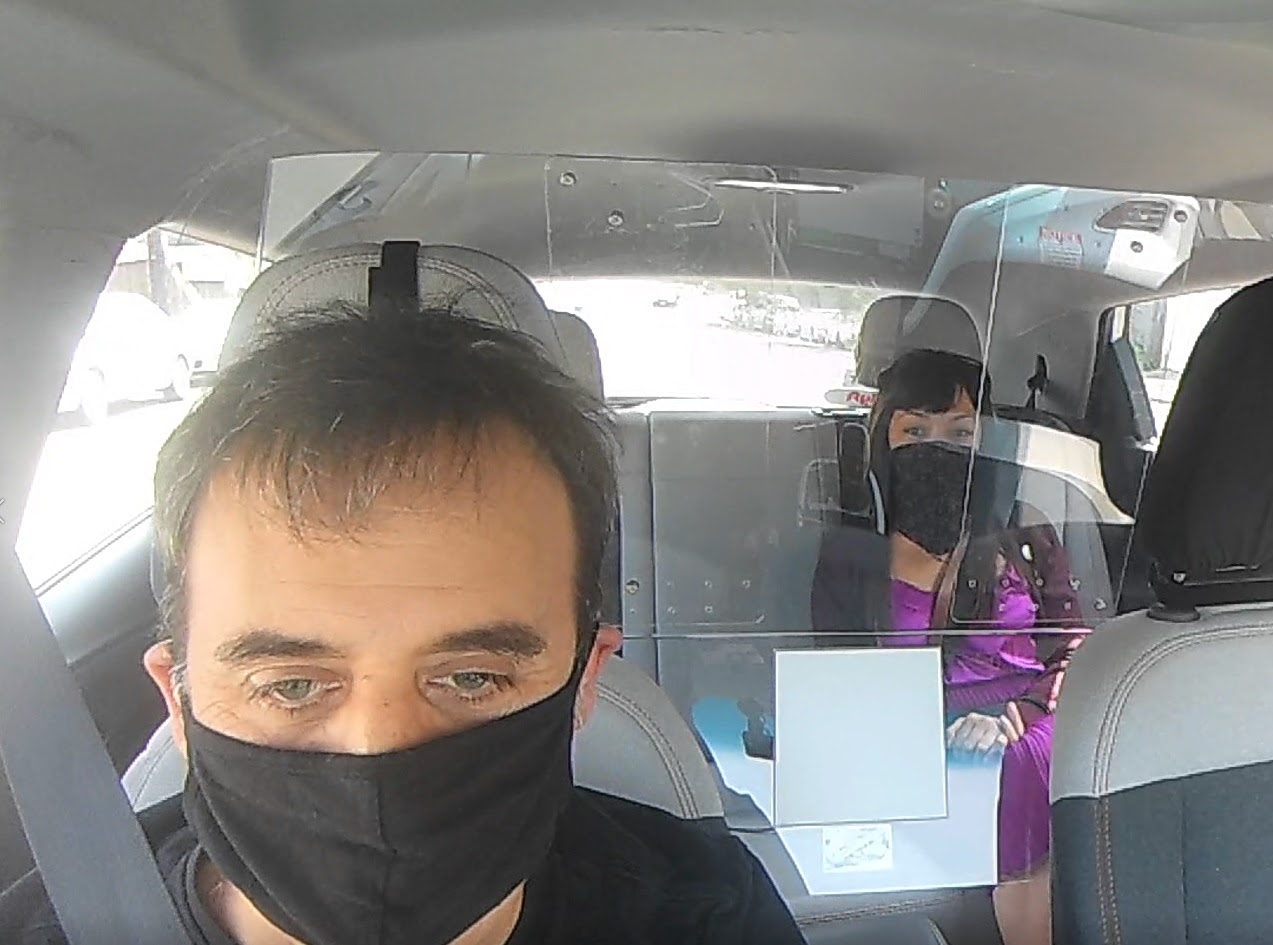
So you’ve chosen to drive. You’re already wearing a mask – it’s required by both Uber and Lyft – and you read our stunningly good guide to masks. But masks are not 100 percent effective in countering COVID-19 transmission, and even if it’s a small chance of infection, when you’re within three feet of dozens or even hundreds of strangers a week, eventually you could roll a snake eyes and get sick.
A shield or other barrier between you and your passenger may reduce these odds. How much? Who knows? is the short answer. As I mentioned in my story on the Lyft driver shield, there isn’t a whole lot of research on disease transmission inside vehicles, so it’s hard to say.
Common sense would tell us anything that keeps a barrier between us and someone else would help, and to that end, I’ve reviewed some of the top products and options out there for drivers.
What Types of Driver Barriers/Shields/Partitions Are There?
1. Rigid floor-to-ceiling vehicle partitions
If you want something to not just protect against transmission of viruses, a rigid shield not only keeps some amount of contaminated vapor from reaching your nose and mouth, but also keeps the rest of your passengers away as well.
Why would you want that? Well, there are thousands of dash-cam videos on YouTube right now showing physical encounters between driver and passenger, and while an eighth-inch of acrylic won’t stop a bullet or even an angry drunk Taco Bell executive, it’ll do a fine job of impeding any back-seat incursions – in either direction. That makes passengers more relaxed as well as drivers.
But which one should you buy? That depends on you, your budget and your needs, as well as the physical limits of your car. The main problem I see with rigid barriers is that unless you’re a genius at marking, cutting and fitting clear plastics, there will be gaps around the sides, top and bottom of the shield, gaps that the happy little particles will have no problem floating through on the way to your respiratory system.
Still, something’s better than nothing, right? The Lyft barrier we already reviewed is one of the nicer ones I’ve seen, but does leave a lot of space above and below. I tried a couple of others as well, and the common issue is size and shape. Too big and they don’t fit your car, too small and the gaps are so large there really doesn’t seem much point. So be sure to measure your vehicle’s interior thoroughly.
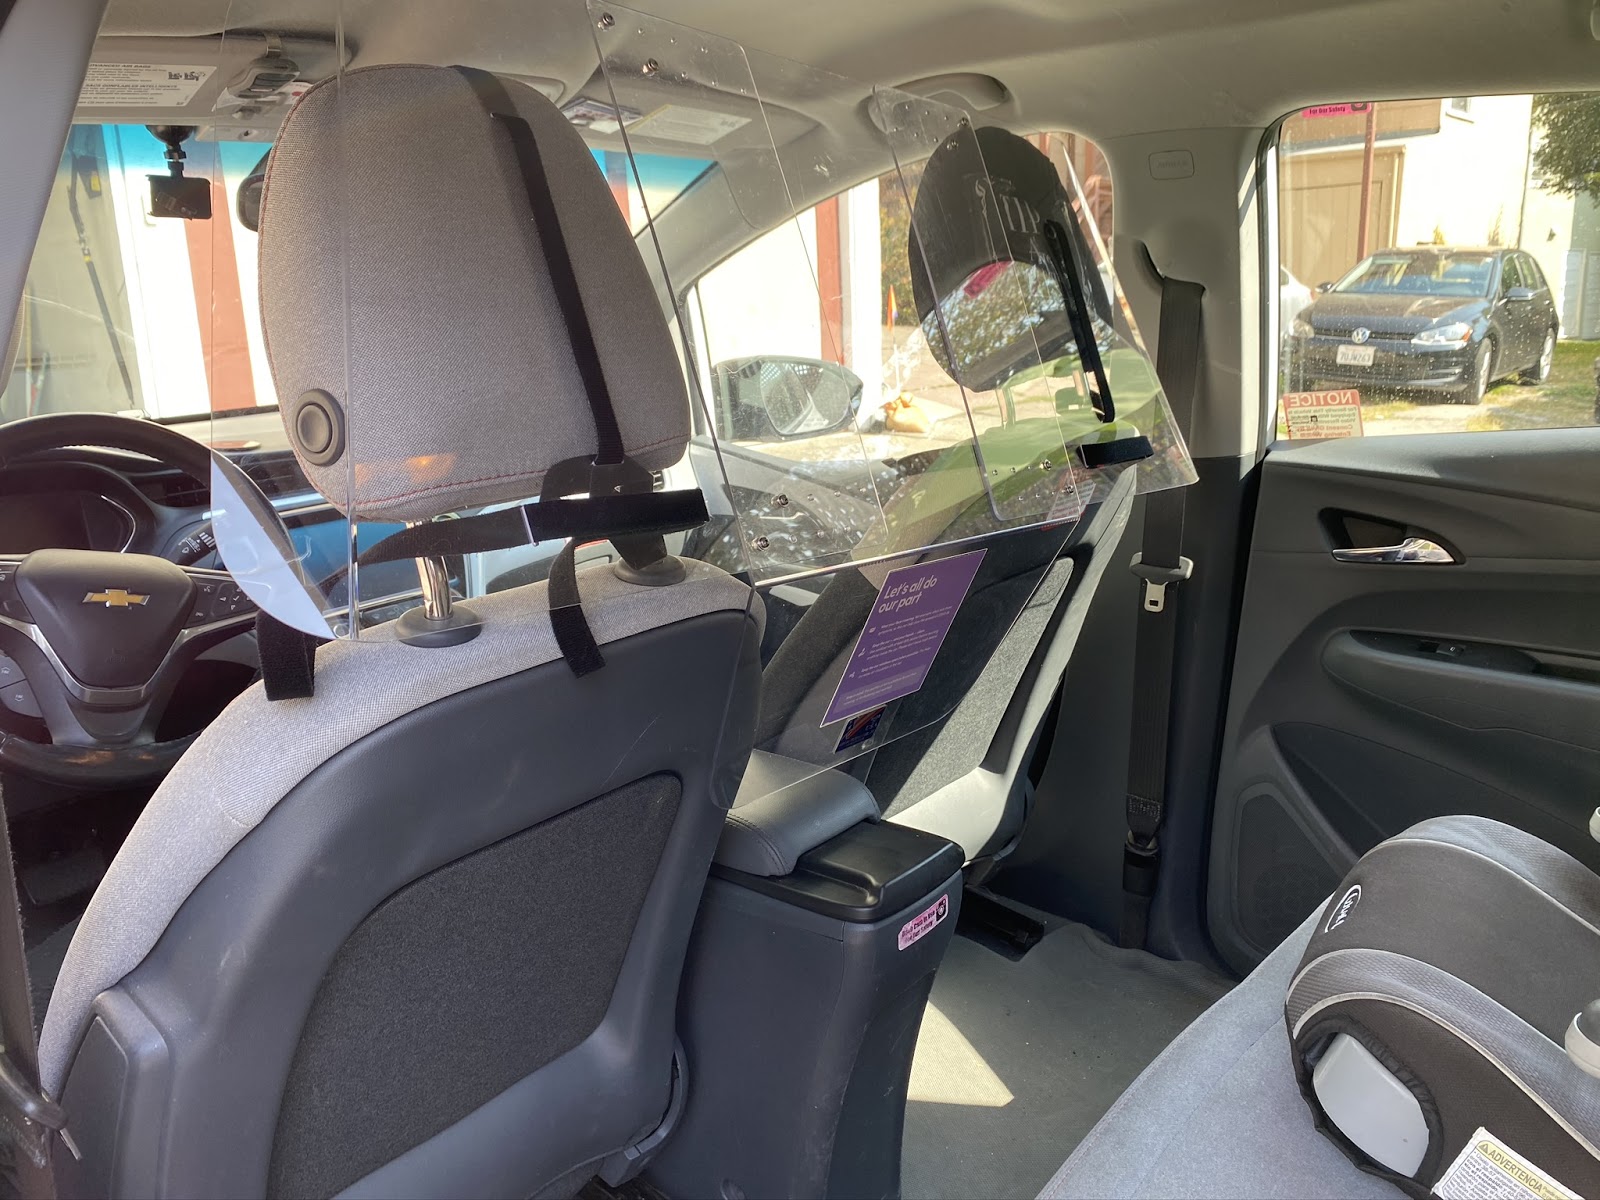
A note on materials – Lexan (AKA polycarbonate) and plexiglass (AKA acrylic) are the two most common materials you’ll find in these products. Polycarbonate is more crack resistant, (and even bulletproof, if thick enough!) but softer and easier to scratch. Acrylic doesn’t scratch as readily, but is much weaker (and cheaper) as well.
- Bargain at $38
- Outstanding quality
- Adjustable
- Big gaps!
- Full review

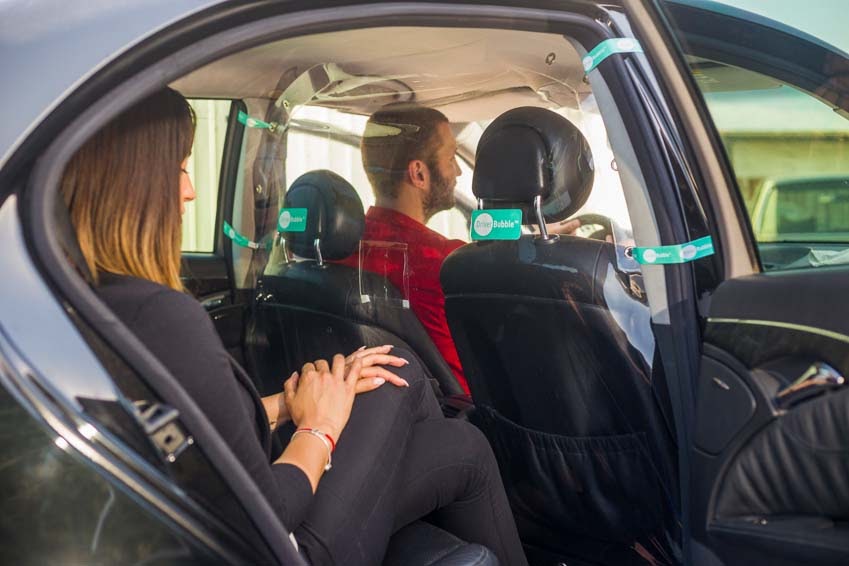
- Nice quality and design
- Driver Bubble offers four different designs
- Thin plastic is light and easy to mount but noisy when in motion
- Doesn’t reach to ceiling and leaves gap underneath; still, provides more coverage than Lyft barrier.
Another option: BUGGY Acrylic Taxi Partition ($119.99 on Amazon)
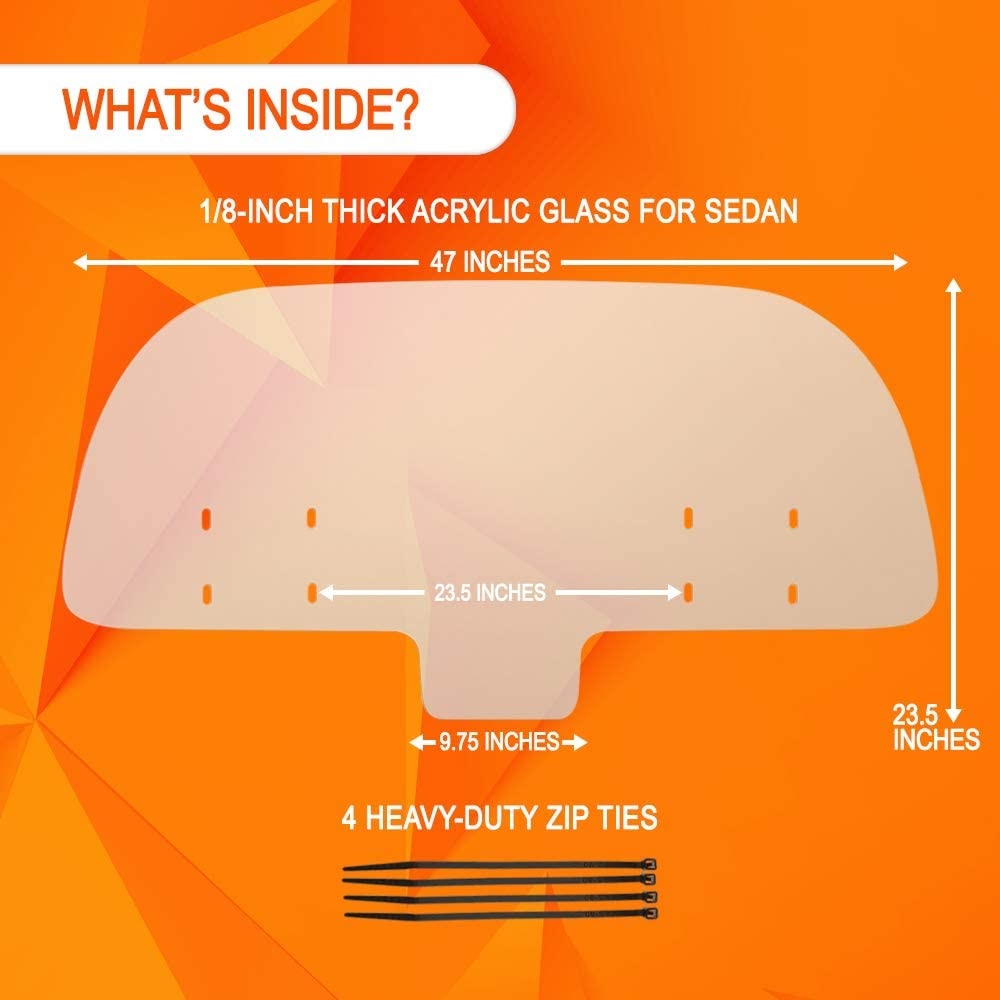 I purchased a different shield on Amazon, but they’re now sold out, which is why I’m not making this a typical Amazon buyer’s guide – the market is too volatile, with brands appearing and disappearing in days. This barrier is typical of the rigid larger sneeze guard options on Amazon right this minute.
- Easy to install
- Comes in two sizes – SUV and Sedan
- Approved by the New York City TLC
- Leaves gaps on top, bottom and sides
Options: Tap Plastics or other plastics retailer DIY (various prices)
- If you’re good at measuring and planning, you can make a perfect-fitting barrier for about $50
- Huge range of materials, from shower curtain thin to literally bullet proof
- You should be patient, careful and handy with cutting tools!
- I recommend designing it in two or three pieces that you screw together to save on materials and shipping costs – big sheets are expensive to buy and ship!
- It still won’t be a perfect fit.
2. Sneeze Guards
A “sneeze guard” is a smaller barrier that isn’t much higher than the top of the headrests and doesn’t extend too far below the top of the seats (ahh, if only we could drive an old-time taxi with bench seats!). The coverage isn’t that much worse, and how much more effective a larger barrier would be is hard to say.
- Light, easy to install and remove
- Doesn’t inhibit transfer of tips between passenger and driver, in case that ever happens
- Half the price of a full barrier
- Less protective
One option: Driver Bubble Sneeze Guard ($58.34 from Driver Bubble)
- Easy to install, adjust and remove
- Seam in center may affect rear-view visibility
- Pricey for small shield!
- Unfortunate brand name
Option: Purelemon Vehicle Sneeze Guard ($89.99 on Amazon)
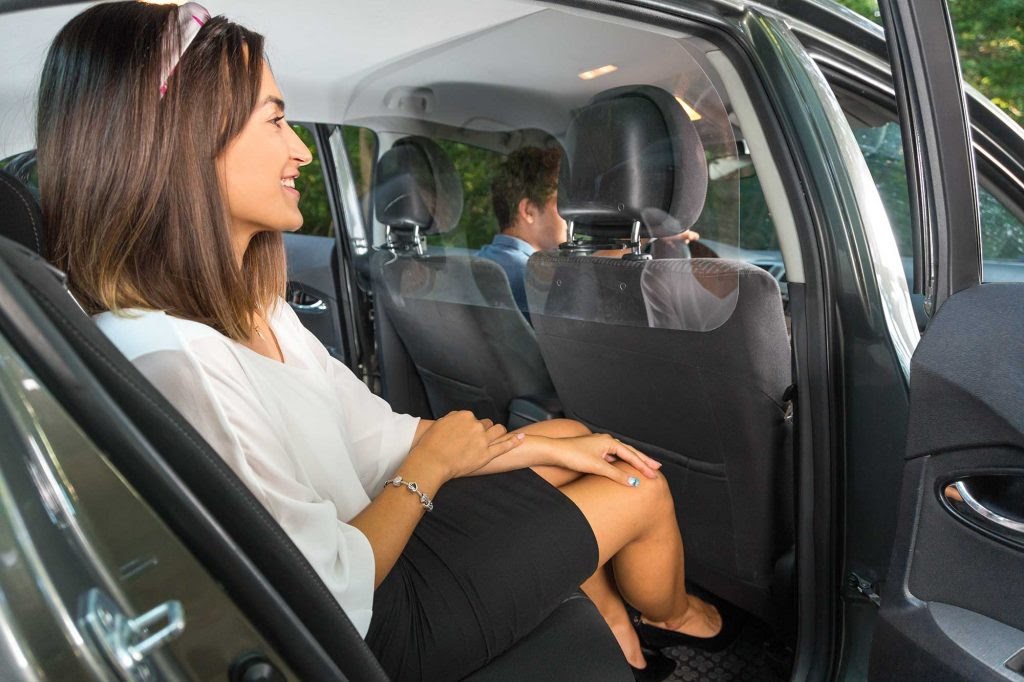
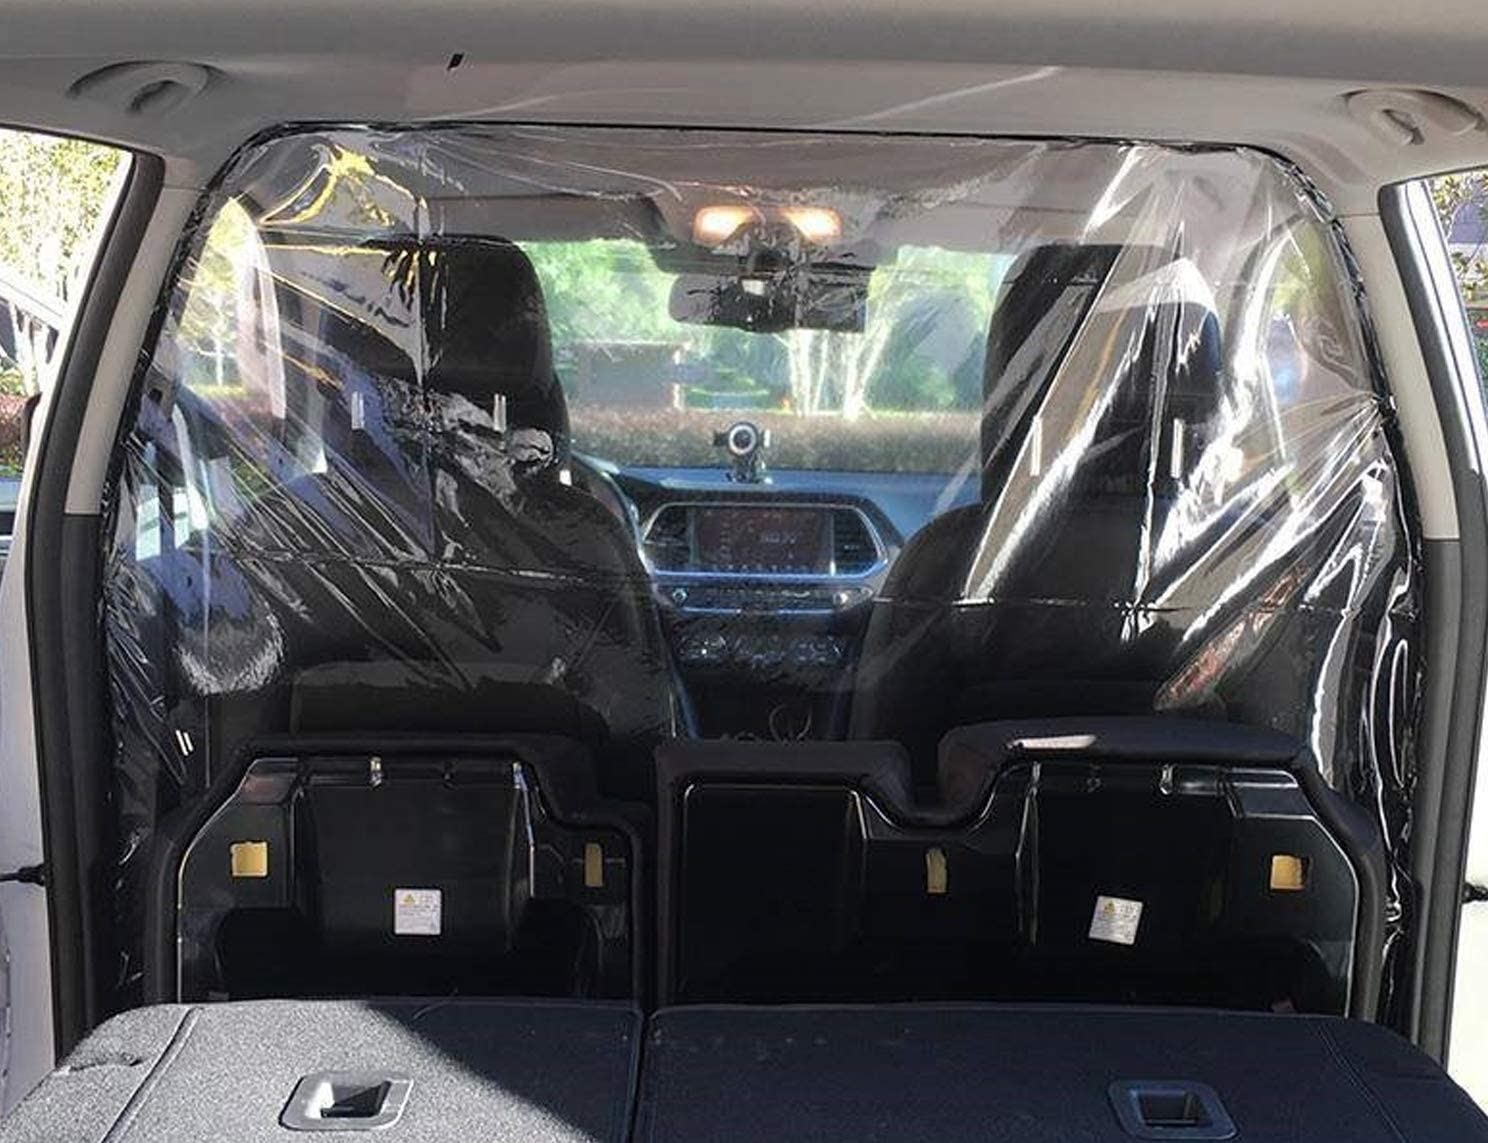
3. Flexible floor-to-ceiling vehicle partitions
These are made of soft, shower-curtain-like material that’s easy to cut and very light. It can be mounted with stickpins, bungee cords, straps, hooks or dual-sided sticky tape and Velcro.
A full-size flexible barrier I can tuck under the seats and attach to the sides of the car is the method I would feel most comfortable with, as you can virtually seal off the back seats from the front. This is not a complete list; just a few I thought had good features and were typical of the offerings you’ll find on Amazon and elsewhere.
- High-quality, thick, tough vinyl with grommets should last a long time.
- Should fit a wide array of vehicles
- Included mounting straps broke easily and didn’t work with my vehicle (2018 Chevy Bolt)
- Can be mounted in other ways, but price doesn’t reflect poorly designed mounting solution.
- Not designed to fully seal rear passenger area
- Flexible material is harder to sanitize than rigid.
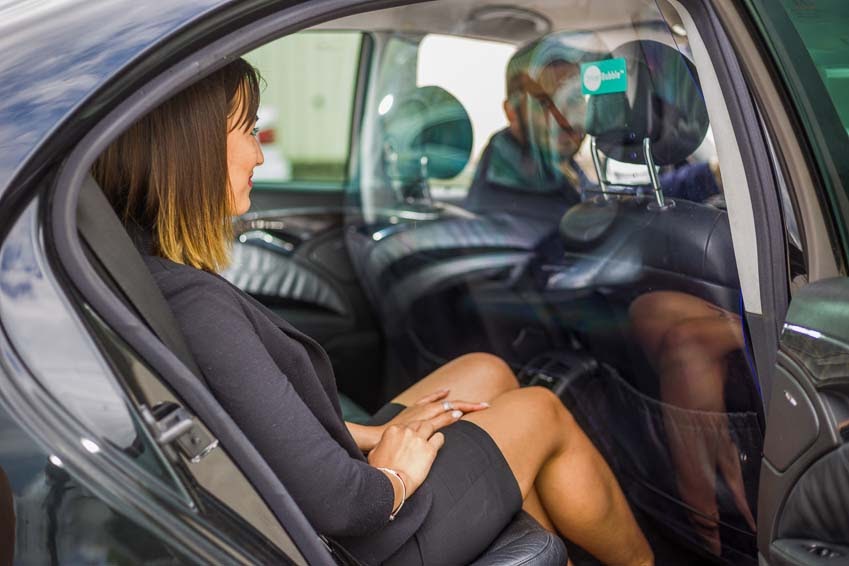
Option (in photo above): Driver Bubble Flex ($46.65 plus shipping from Driver Bubble)

- Available in two sizes, sedan and SUV
- Comprehensive mounting hardware included
- Has provision for rear A/C vent
- Also not designed to fully seal rear passenger area
- Flexible material is harder to sanitize than rigid.
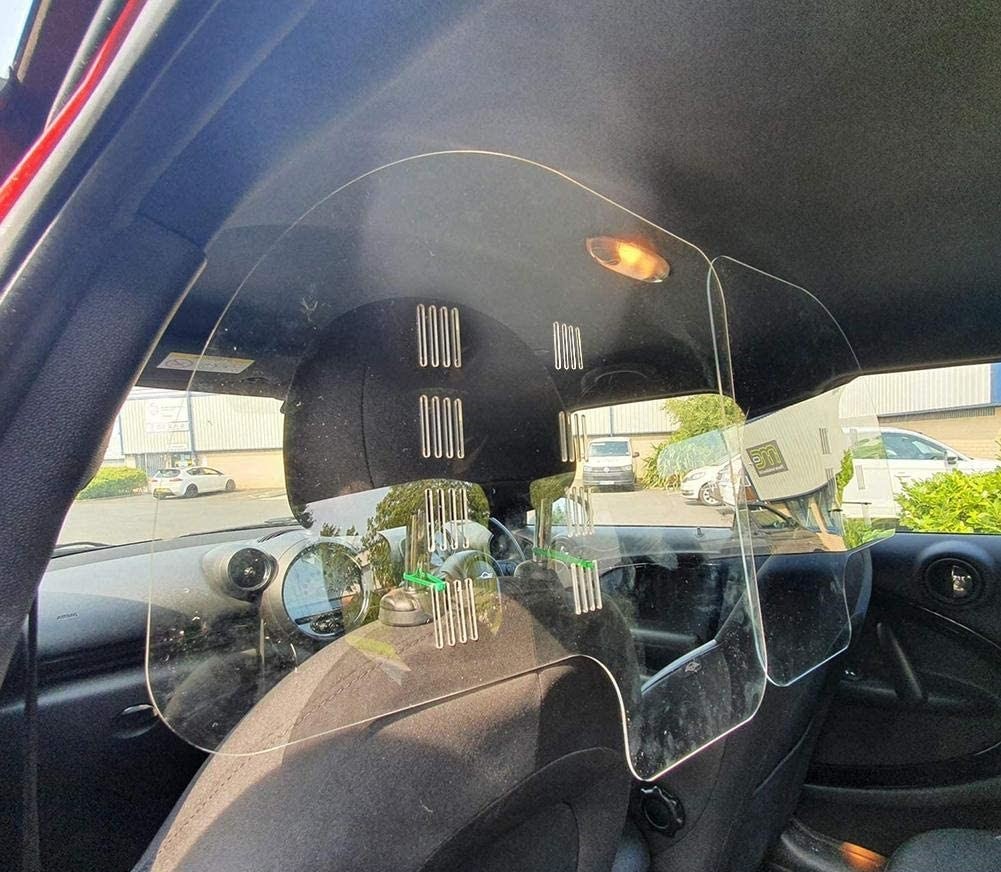
Option: KSK Bubble Sneeze Guard ($42.49-$50.99 from Amazon)
- Extremely affordable at $20
- Trim to size and shape to totally isolate passengers from driver
- Sticky-tape mounting solution is temporary and leaves marks on headliner
- Restricts rear visibility and makes it harder to hear passengers
- How do you take a cash tip?
Option (in photo above): “Car Isolation Film” from JANYUN ($19.98 on Amazon)
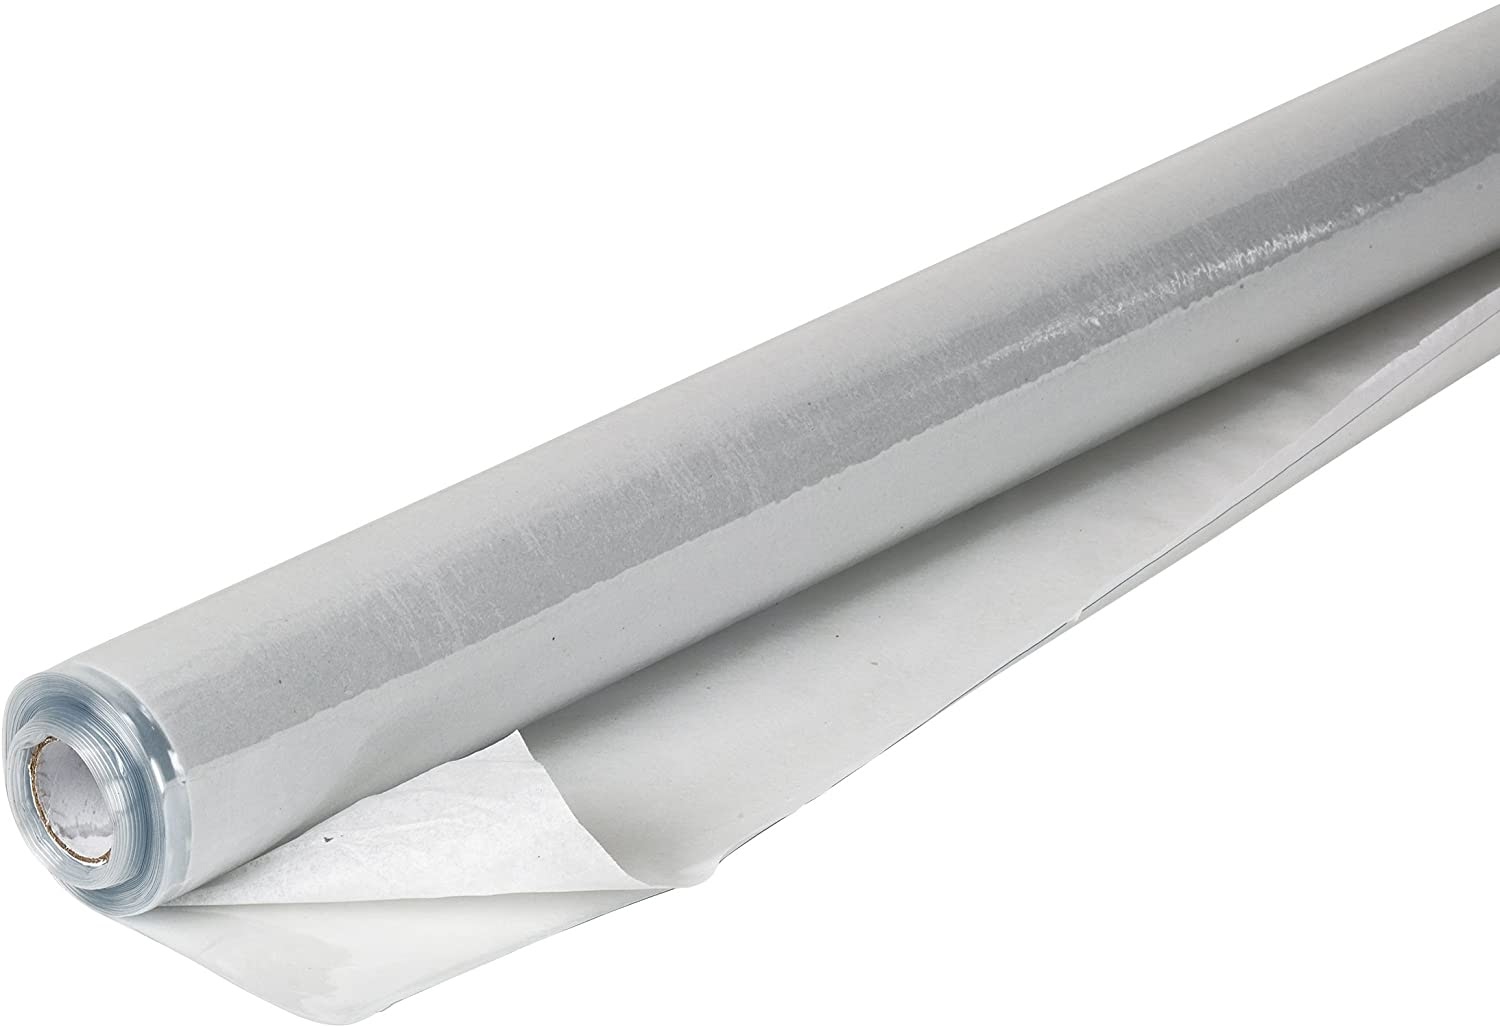 CAPTION: DIY vinyl sheeting (as cheap as $12 for a 44 by 216-inch by 4-mil roll)
- You can choose thickness and size, then trim to fit your car perfectly
- You’ll need to devise a good mounting solution for your car
- Very affordable
- Flexible material is harder to sanitize than rigid.
Options (similar to above photo): DIY Vinyl Sheeting
What’s It Like to Use a Vehicle Partition?
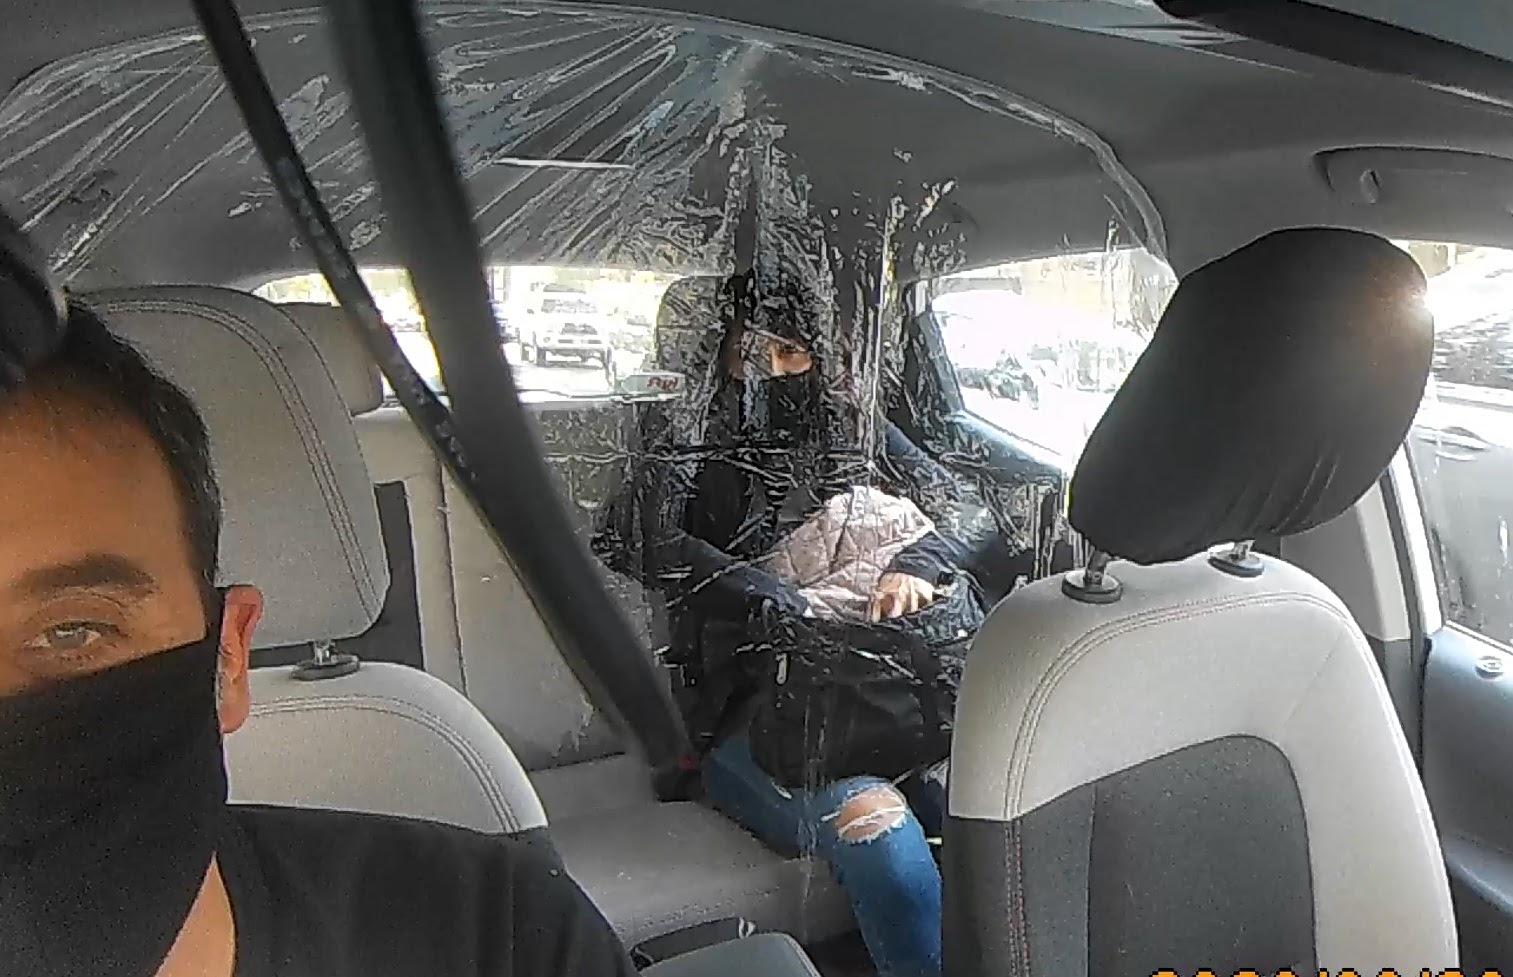 Once you have your solution in place, you’ll quickly get used to it. Though some of these barriers restricted visibility out the back window – it sometimes felt like I’d been swallowed by an immense jellyfish – it wasn’t dangerously so.
The rigid barriers that attach to the seats are the best to drive with, as they offer the most clarity, are easy to clean (do NOT use paper towels on acrylic or plexiglass!!! You will make little micro-scratches and the plastic will soon be cloudy-looking) and stay firmly in place. But they also leave gaps, which might make passengers uncomfortable (and definitely makes me uncomfortable!).
I liked the vinyl barrier the most, but passengers didn’t really seem to have a preference. The most common reaction, when I could get one, was gratitude for the extra effort I made to keep us safe, regardless of the type of shield.
“It doesn’t bother you at all?” I asked one passenger. “I don’t have a fear of plastic” was the reply.
The passengers I had in my car while testing the barriers usually reported that about half the other drivers were using some kind of barrier, but this is in the San Francisco Bay Area, where there is likely greater use of barriers than nationally. Still, the benefits of having one of these is obvious.
Conclusion: Should You Get a Vehicle Partition for Your Car?
 There’s no doubt in my mind: if you’re going to be taking more than a few trips a week, you should absolutely get a driver partition or barrier.
A good barrier, properly installed, and used in conjunction with the CDC’s recommendations – masks for all parties, windows rolled down, no front-seat passengers – likely reduces the chance of infection to an acceptable level, though again, I can’t say how much without some (expensive) testing. So yes – get one.
But what kind? Rigid barriers and sneeze guards leave sizeable gaps around the edges, which negates the point of having a barrier.
If I start driving full time, I’ll likely get a soft vinyl barrier that I trim to size and firmly attach with a combination of pins, heavy-duty Velcro tape or even staples. Vinyl offers a lot of advantages – weight, mounting (and physical) flexibility and the elimination of any gaps – over rigid barriers besides being extremely cheap.
I’m hoping some enterprising soul reads this and starts making some perfectly sized kits for popular rideshare vehicles, like the Prius, Corolla or Camry.
Stay safe!
Drivers, are you currently using a barrier, shield or partition?
-Gabe @ RSG