We frequently get questions about operating the various rideshare apps, and how to use the Lyft Driver App, is no exception.
To help answer those questions, we’ve put together a video tutorial to walk you through every step of how the Lyft app works.
Watch our video on How to Use the Lyft Driver App:
How the Lyft Driver App Works
Jay Cradeur here, and today, I will walk you through the most important components of the Lyft Driver app.
There are many similarities between the Uber and Lyft Driver apps.
However, there are some crucial differences as well which I will point out below.
Let’s get started at the beginning.
Lyft Driver App: Home Screen
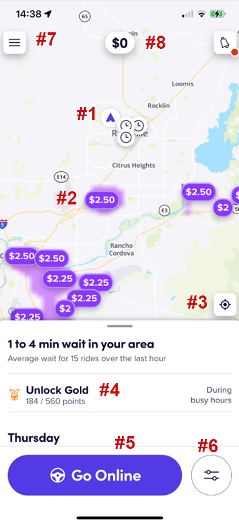
There is a lot of information on the Lyft Driver App home screen, but don’t worry, after driving for a few days, you will get the hang of it.
On the home screen, you have access to everything that is available in the app.
In addition, the home screen provides the following information:
- Your Location
- Surge
- Center the map
- Lyft Rewards Program Status
- Tap to Go Online Button.
- This is how you start your day and begin to see available rides which you may accept or decline.
- Location Filter Button
- This is the menu button to access more components of the Lyft Driver App
- Earning for the Day
Lyft Driver App: Bonus Screens
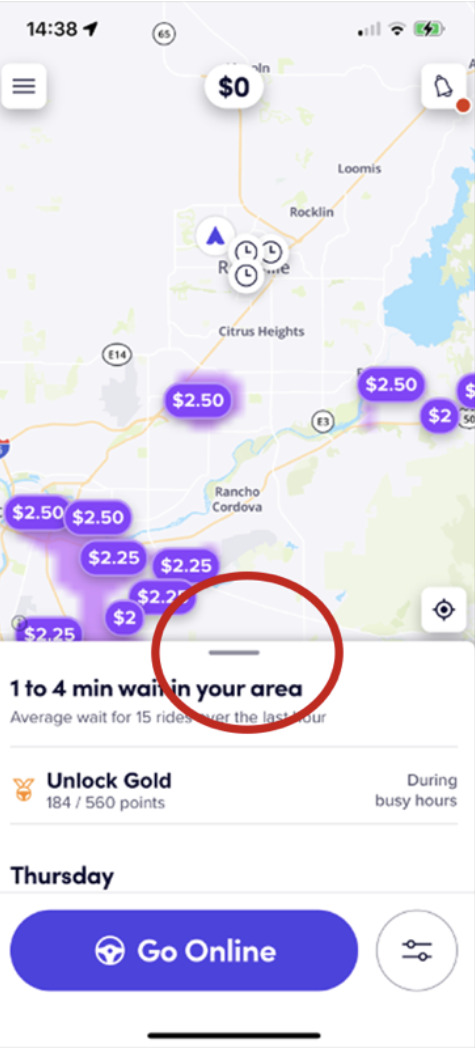
The Bonus Screen shows you various information that could impact your revenue.
To access the Bonus Screen information, you must slide up as indicated in the screenshot below:
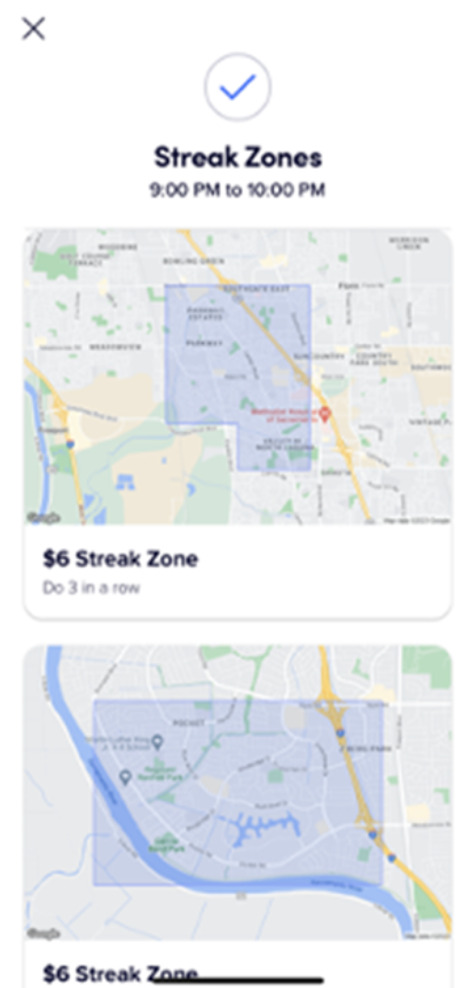
This will open up the full screen, which displays a $6 streak bonus in the example below. The streak bonus is $6 for completing 3 rides in a row. Sometimes, these Streak Bonuses cover an entire area.
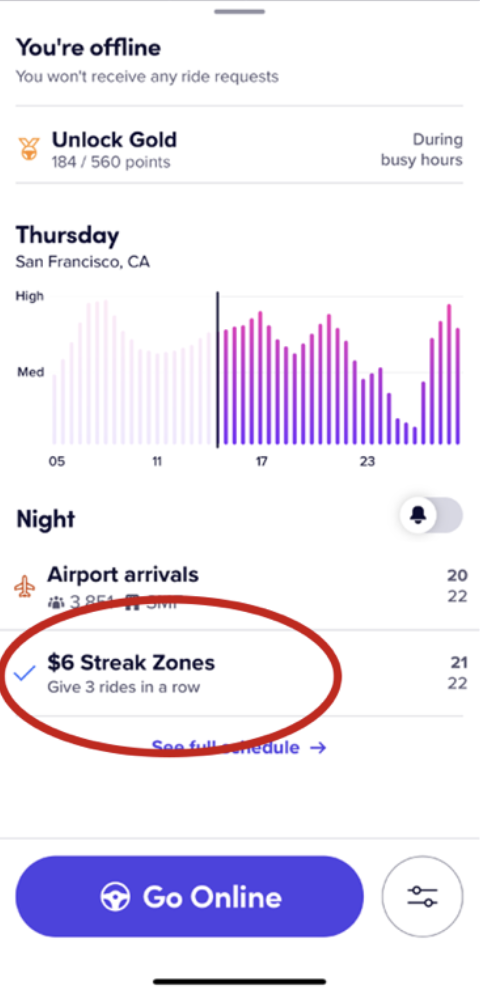
Other times, as you can see in the screenshot below, only certain zones will allow you to start a Streak Bonus.
If you tap on the Streak Zone, you will see a listing of the available zones. You must be in a zone and then accept the first ride.
Once your streak starts, you can drive anywhere and still qualify for the bonus.
Lyft Driver App: Location Filter Screens
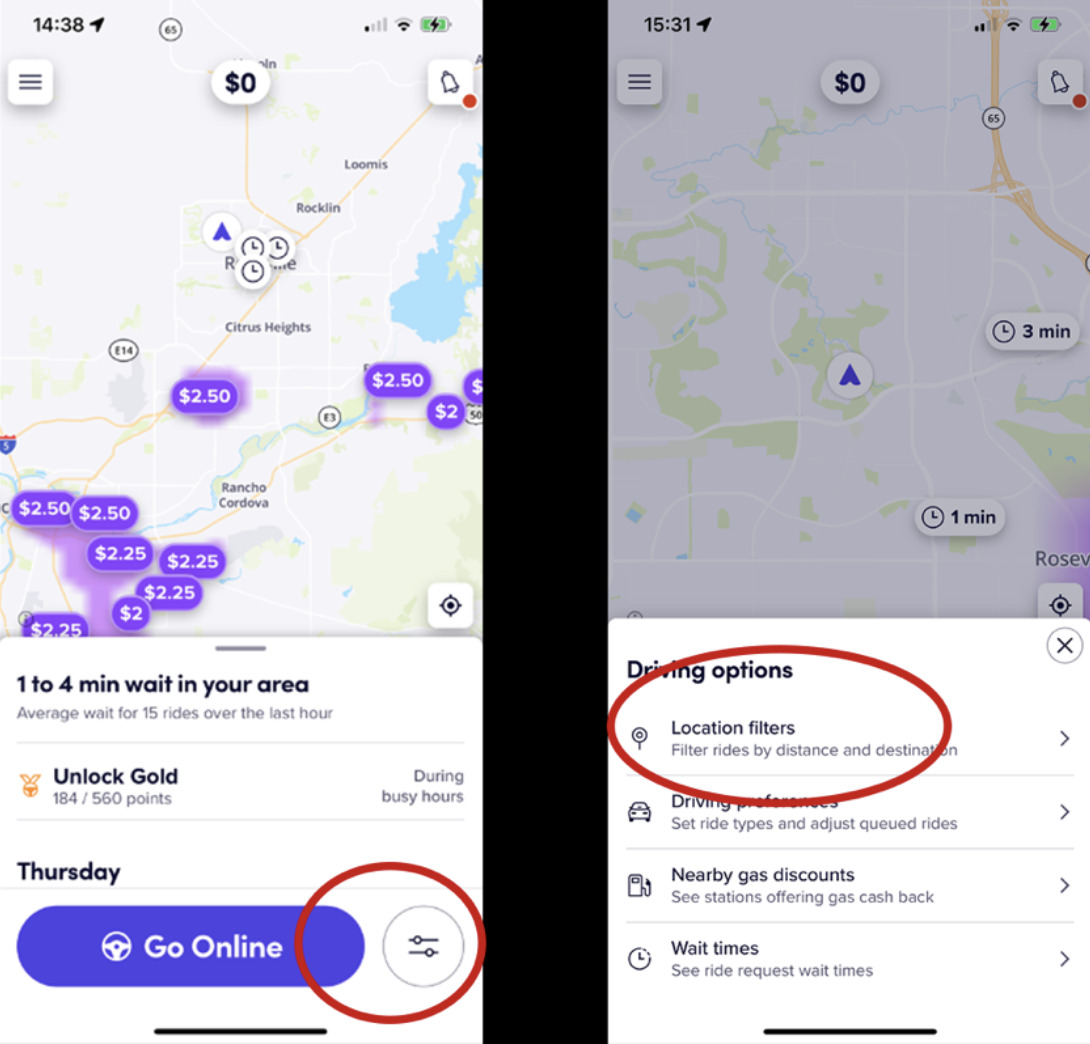
To access these important and valuable tools, click on the button indicated in the first screenshot below, then you will see the second screenshot.
According to the second screenshot tap on Location filters, and you will have two options, as seen in the third screenshot, both of which are extremely valuable.
Location Filters: Stay Within Your Area
The first option as you can see below is to Stay Within the Area. As you can see in the second screenshot, you can then indicate an area in which you don’t want to leave.
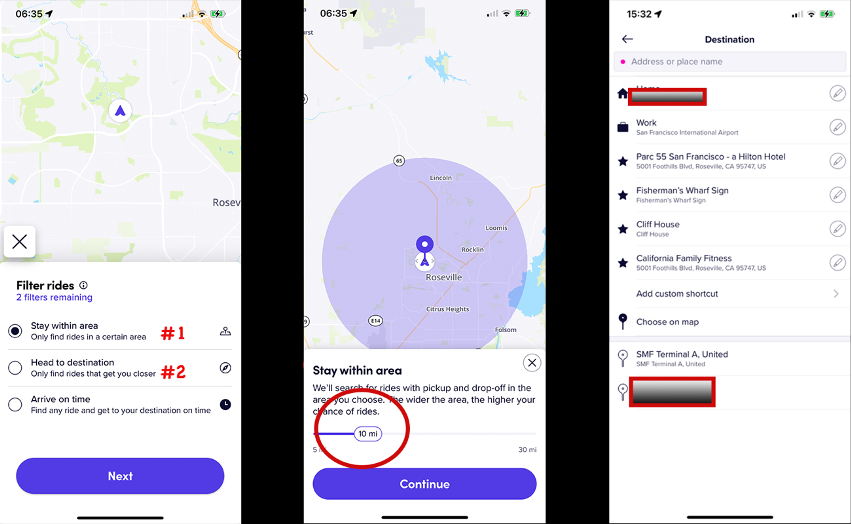
Let’s say you are at the end of your shift and don’t want any rides that will take you too far away from your home. You can set the locations filter to keep you within a 5-mile radius of your home. You won’t get as many ride options, but you will know that if you get one, it will fit your preferences.
This location filter is also valuable if you need a bonus that requires many rides. By limiting your area, you are ensuring you will only get short rides. Again, you won’t get as many ride options, but each ride you get will meet your requirements.
Location Filters: Head to Destination
The second option is Head To Destination, I like to use this one toward the end of my shift.
I set my destination as home, and then Lyft will only give me rides that move me closer to home.
This feature provides a wonderful way to head home while also picking up more rides before the end of your shift.
The third screenshot above shows you where you can type in an address. You can also save an address for future use, as I have done with Home on the top.
Lyft Driver App: Driving Preferences Screen
This is one of the most important features which distinguishes Lyft from Uber.
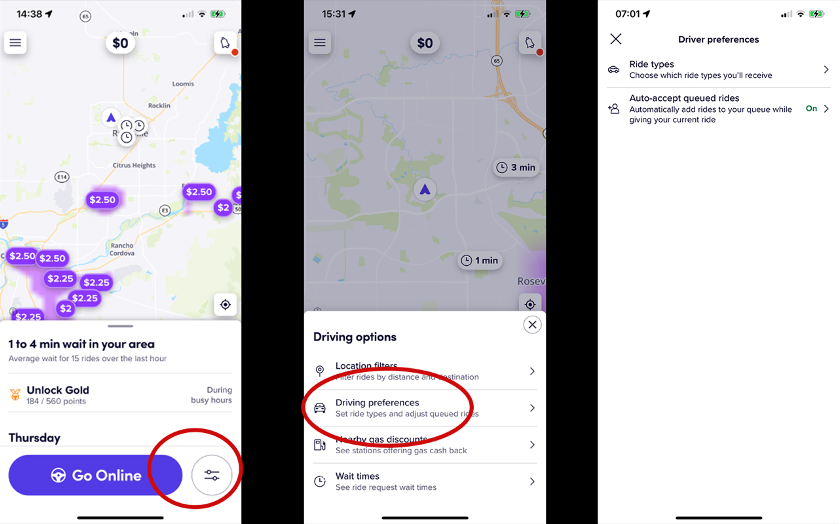
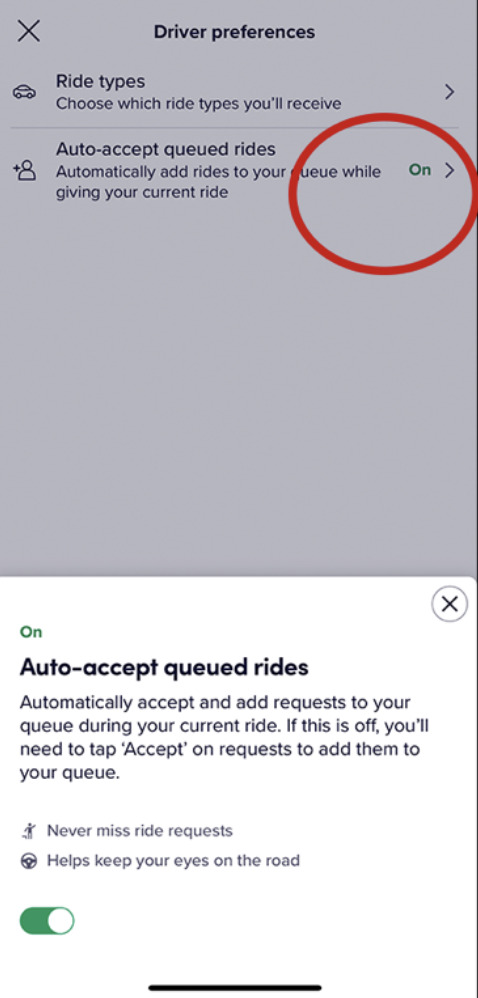
Just below Location Filters is Driving Preferences. In the third screenshot below, you can select Ride Types and Auto Accept Queued Rides.
Auto Accept Queued Rides
Auto Accept Queued Rides allows you to drive with a passenger in your car while Lyft sets you up with the next passenger.
I recommend you turn this feature to ON. You will still have the opportunity to cancel the ride if it does not meet your parameters.
The great thing about this feature is you will never lose a ride. You will get an audio announcement, and then you can look at the ride anytime. If you want the ride, you don’t need to do anything, if you don’t want the ride, simply press the Cancel Button.
Ride Types
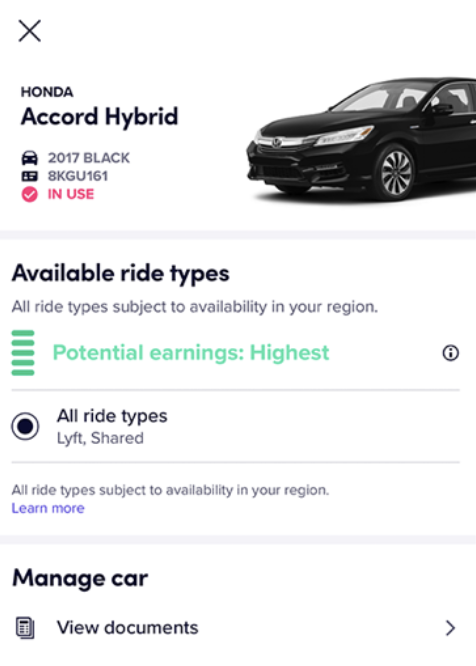
The Ride Types screen shows you what kind of rides you are approved to deliver. The screen shows Lyft and Shared.
However, Lyft no longer offers Shared rides, so that is not an option. Lyft needs to update its app. You can also access all your documents and ensure everything is current.
Lyft Driver App: Settings Screen
Another key source of information in the Lyft Driver App is Settings.
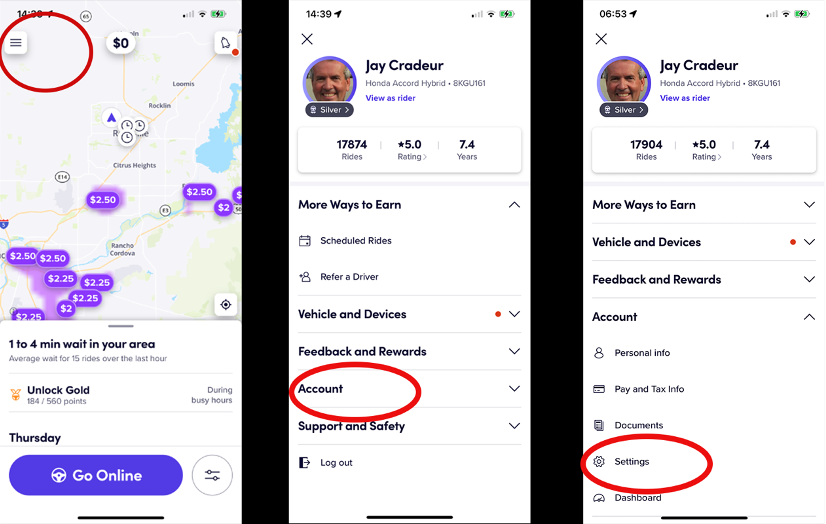
Click on the upper left pancakes, click on Account, then click on Settings.
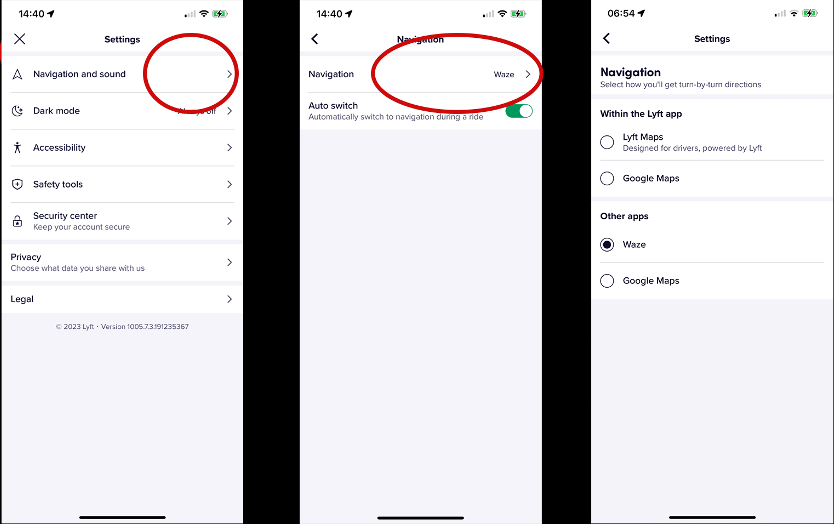
Once you are within Settings, the first thing we want to do is select our Navigation technology.
Since I first started driving for Lyft, I have used Waze, I prefer it because it is the most accurate. Visually, it is the easiest for me to follow.
However, you can select from several options, as shown in the third screenshot below.
You have three options, Lyft Maps, Google Maps, or Waze.
There are several more areas that you can explore within the setting of the Lyft Driver App.
Perhaps you don’t like Lyft’s Dark Mode, you can turn it off.
Be sure to look at the Safety Tools to know all your options on the road.
It’s good in the beginning to press all the buttons and get familiar with all your options.
Lyft Driver App: Revenue Screens
Of course, we all want to know how much money we make.
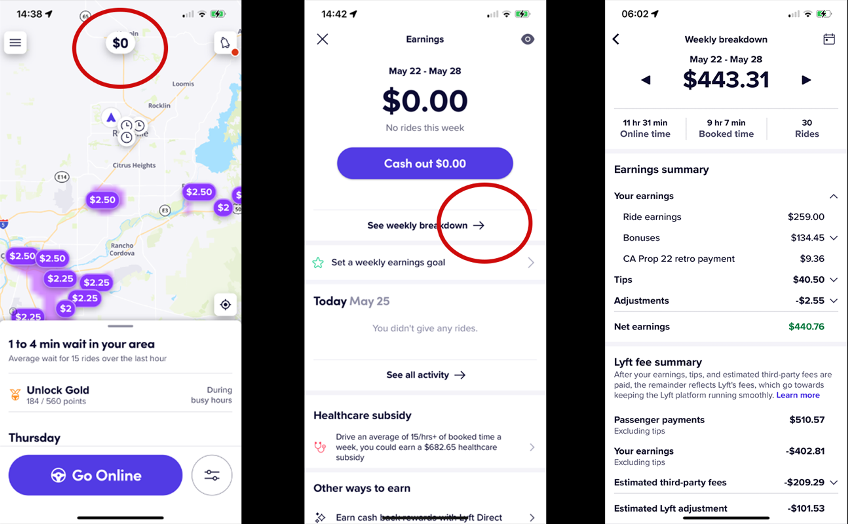
Press on the dollar figure in the upper center of the first screenshot below. I had not worked at the time of this screenshot, so my value is $0.
If you want to see your weekly earnings for this week or past weeks, you can tap on See Weekly Breakdown, which will take you to the third screenshot below.
Here you get a tremendous amount of data, including tips, bonuses, and even how much your passengers paid.
Lyft Express Pay Option
Lyft allows you to cash out your earnings immediately once you’ve made at least $50.
Tap on the Cash Out button that you can see in the second screenshot above, and you’ll get to cash out all of your earnings, less a $0.85 transaction fee.
For most folks, the money will be deposited in your bank account within seconds or so, but the process can take longer, depending on your bank.
3 More Cool Features of the Lyft Driver App
I am highlighting a few more important aspects of the Lyft Driver app.
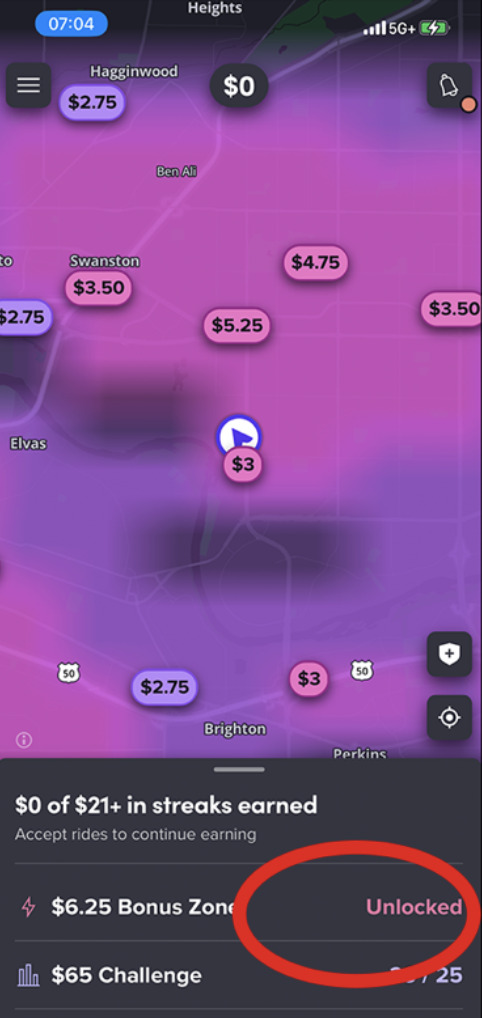
Reduce & Enlarge the Map
You can reduce and enlarge the screen using two fingers to pinch down or spread out.
This is useful when I want more specificity regarding surge. Also, you can see I highlighted what happens when you access a surge bonus.
In this example, I unlocked a $6.25 bonus on my next ride.
Toggle Button Between Lyft & Waze
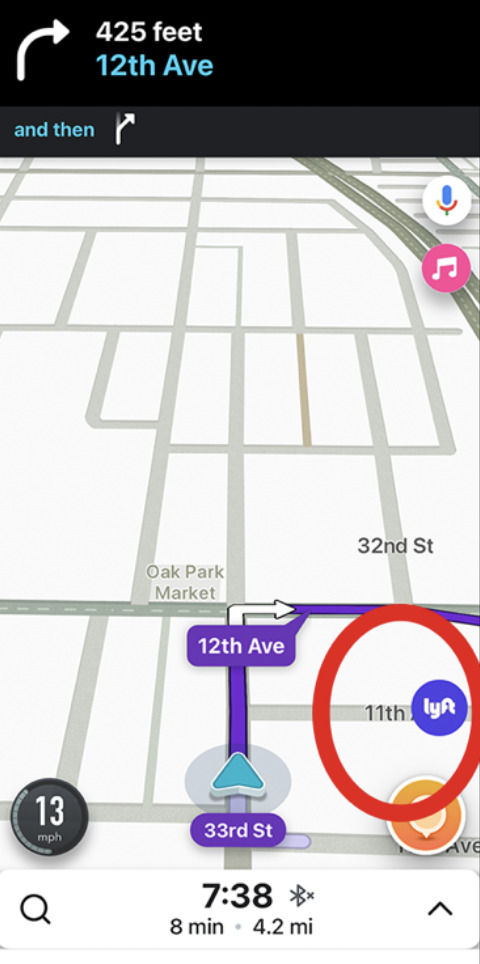
Here is a nice little button Lyft adds to Wazeto make it easier to toggle between the two apps, it is very handy.
Seeing the Passenger in the App
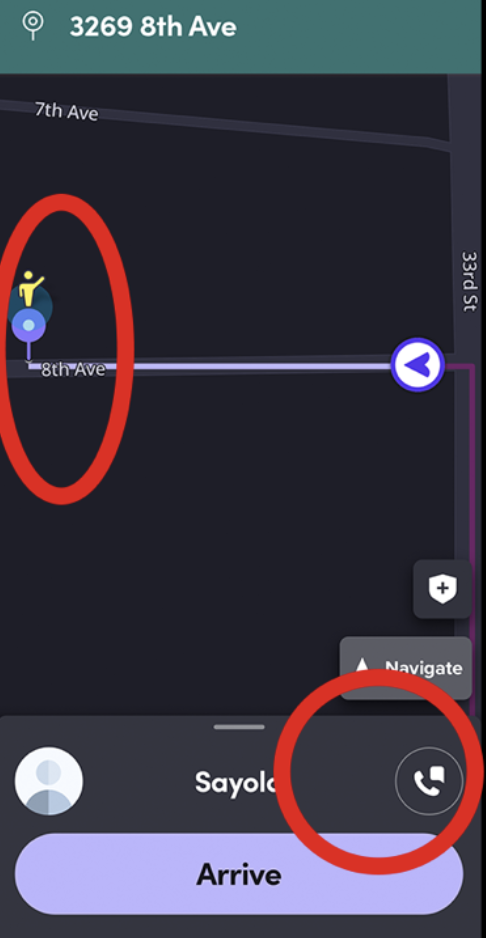
And finally, I wanted you to see how the passenger appears in the app as a bright yellow figure.
This helps me to see where the passenger physically is and confirm I am at the right location.
The pickup location and passenger are often different, especially in an apartment complex. This is when it is a good time to text or call your passenger to confirm the accurate pick-up location.
To call or text, Tap the phone icon to the right.
Summary
I love the Lyft Driver app, to me, it is more driver-friendly than the Uber app, and I especially love the auto-accept feature, a feature that Uber does not provide.
The only way you will master the Lyft Driver app is to start using it. I remember being nervous when my first ping came in. Once you have a few hundred rides under your belt, you will feel like a pro.
Have fun with it, and be safe out there.
