Using the Uber driver app is pretty straightforward – open your app, get online and start driving. However, there are a few interesting features on the Uber driver app you may not be aware of. Senior RSG contributor Jay Cradeur highlights his favorite hidden features of the Uber driver app below.
I know we all like to complain about the Uber app from time to time but it really is a remarkable piece of technology. Think about it: we drivers drive around waiting for a ping. The app knows where I am, where passengers are, where other drivers are, and then based on proximity and other mystery factors, makes a match. It is equipped to handle cancelations, multiple passenger rides (Uber Pool), GPS directions, payment, ratings, comments, and then the app will assign you your next ride before you even get done with your current ride.
Now, we also have the Uber destination filter to help us stay in a particular direction toward a selected destination. We can also see how much we have earned, and transfer those funds instantaneously to our bank account with Uber Instant Pay.
This article will share some lesser known features which you may be able to incorporate into your driving to make your job more enjoyable and profitable.
Little Known Uber App Feature #1: Speed Up Your Pick Ups
I estimate that half the time I arrive at a pick up and the passenger is not “toes on the curb.” One of the least enjoyable parts of the driver job is waiting for a passenger. Sometimes the passenger is taking forever but other times, the network is just slow and they may not be seeing the Uber notification.
One thing you can do, to remind your passenger that you have arrived, is to send a pre-typed text message that says “I have arrived.”
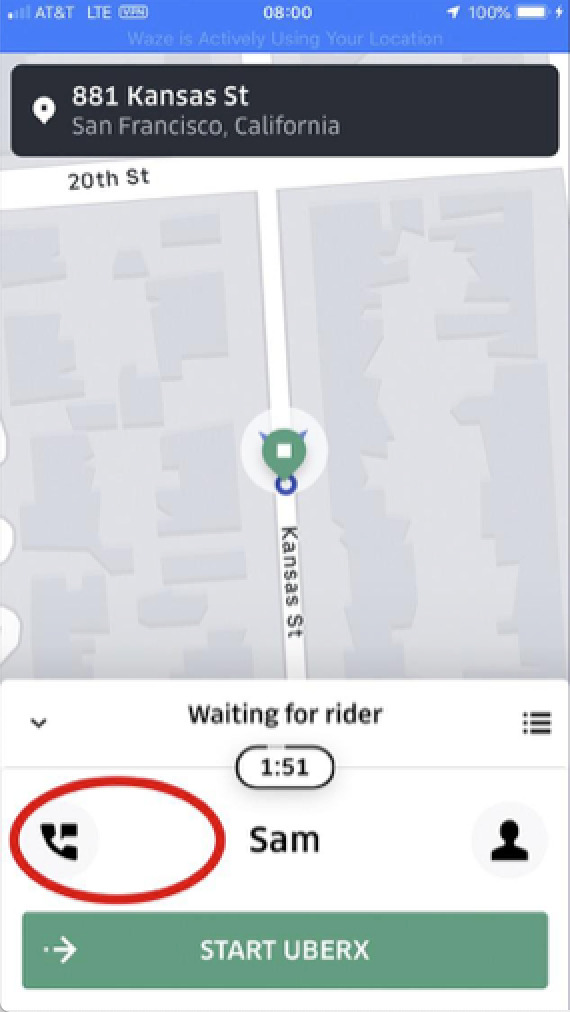

This techniques notifies the passenger you have arrived and lets the passenger know you are a serious driver who wants to be sure the passenger knows you have arrived, and you don’t want the passenger to be late and get charged cancelation fee.
#2: Learn What You Are Paid In Different Regions
Since I drive in the San Francisco bay area, it is important for me to know where I get paid the highest rates, and where I get paid the lowest rates. Once I have this information, I can use destination filters to return to the highest paying area so that I can maximize my revenue. It takes a few steps, but you can get good information from the app.
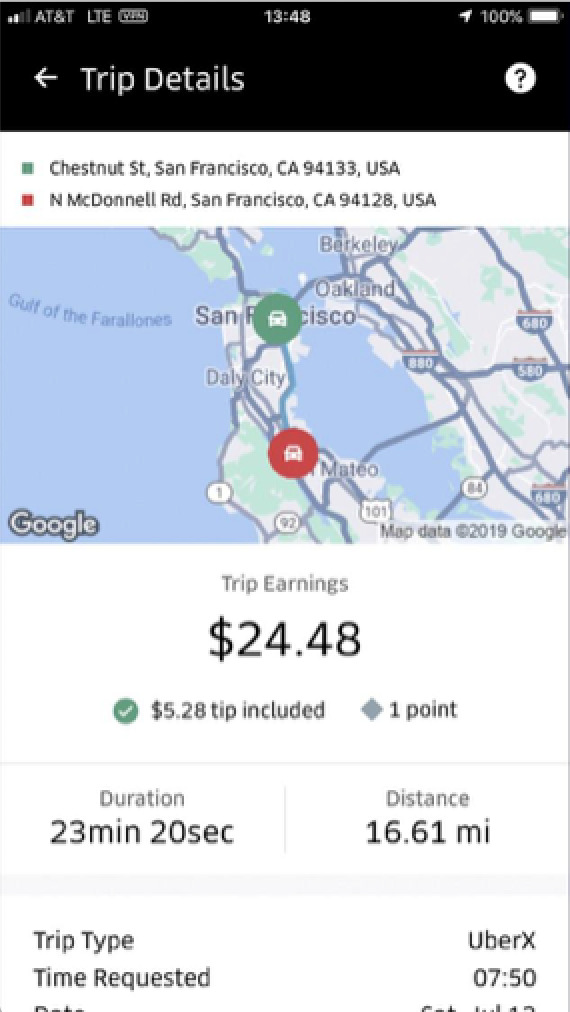
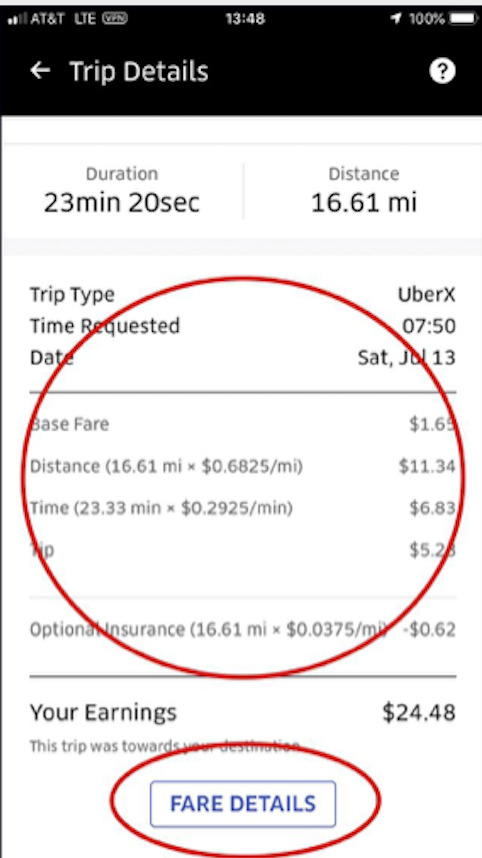
In the Earnings section, click on a trip in the area you want the information. Screenshot #1 show you what a trip summary looks like. Scroll down to the bottom and you will see screenshot #2. Here you can see how much you are paid per mile (I am paid 68.25 cents per mile), how much you are paid per minute (29.25 cents per minute) and how much you are paid in Base Fare ($1.65).
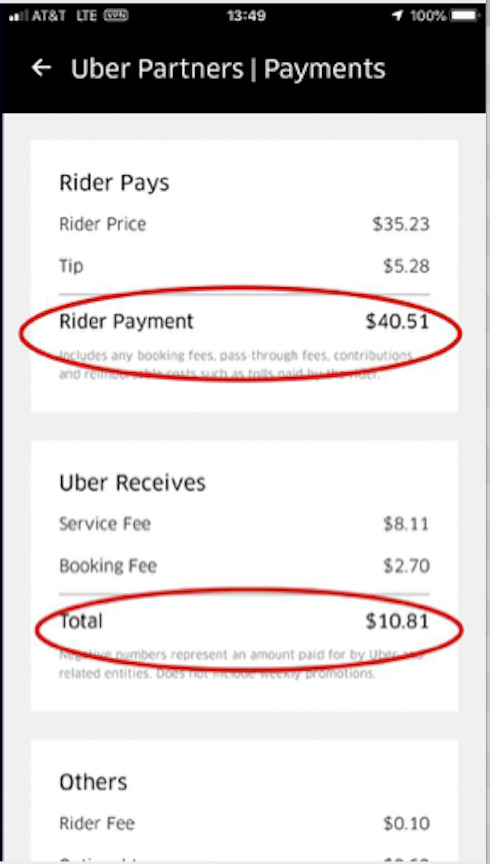
If you are further curious, you can click on Fare Details and see how much you earned relative to what Uber earned. When I do this for rides in another area, such as San Jose or Oakland, I can see whether I am paid more or less and then adjust my driving habits accordingly.
⭐️Advertisement: Download the GetUpside app and save money on every gallon of gas you buy. Plus get a bonus offer by using this referral link.
#3: Boost Your Profile
Many passengers will take a look at your profile whether you realize it or not, which they will have access to once you are assigned as their driver. It takes just two clicks to see what you profile looks like.
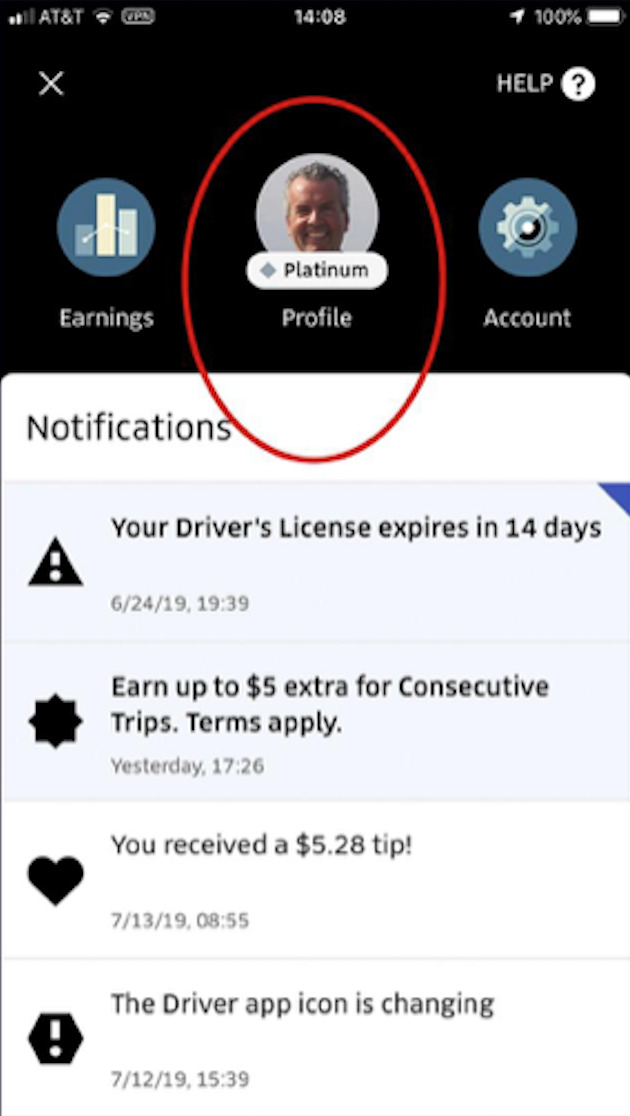
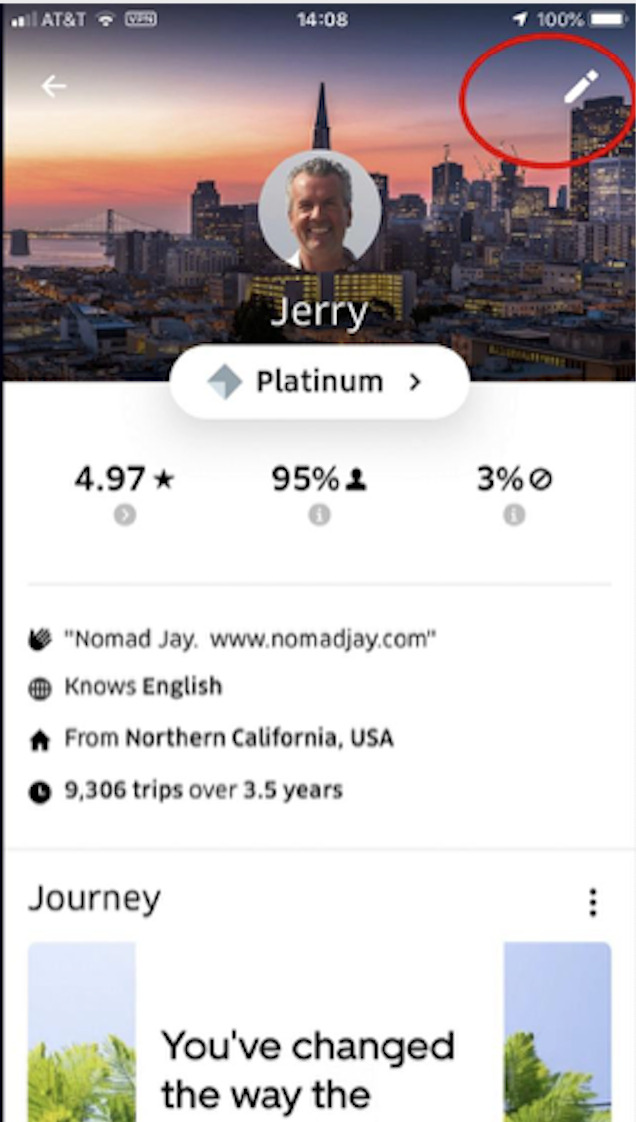
You can make changes to your profile by clicking on the pencil in the upper right hand corner.
If you have a website or service to promote, you can mention it here in your profile and then some of your passengers may ask you about it.
For example, you could add a line that says “ask me how to get $10 off your next Uber/Lyft ride!”. And then when the passenger asks you about it, tell them about the Freebird app and make money when you refer new users.
I also have business cards in my car with the same information.
#4: Use Both Your Destination Filters
Uber provides you with two destination filters each day. The day begins at 12 midnight. It is very easy to use the destination filters.
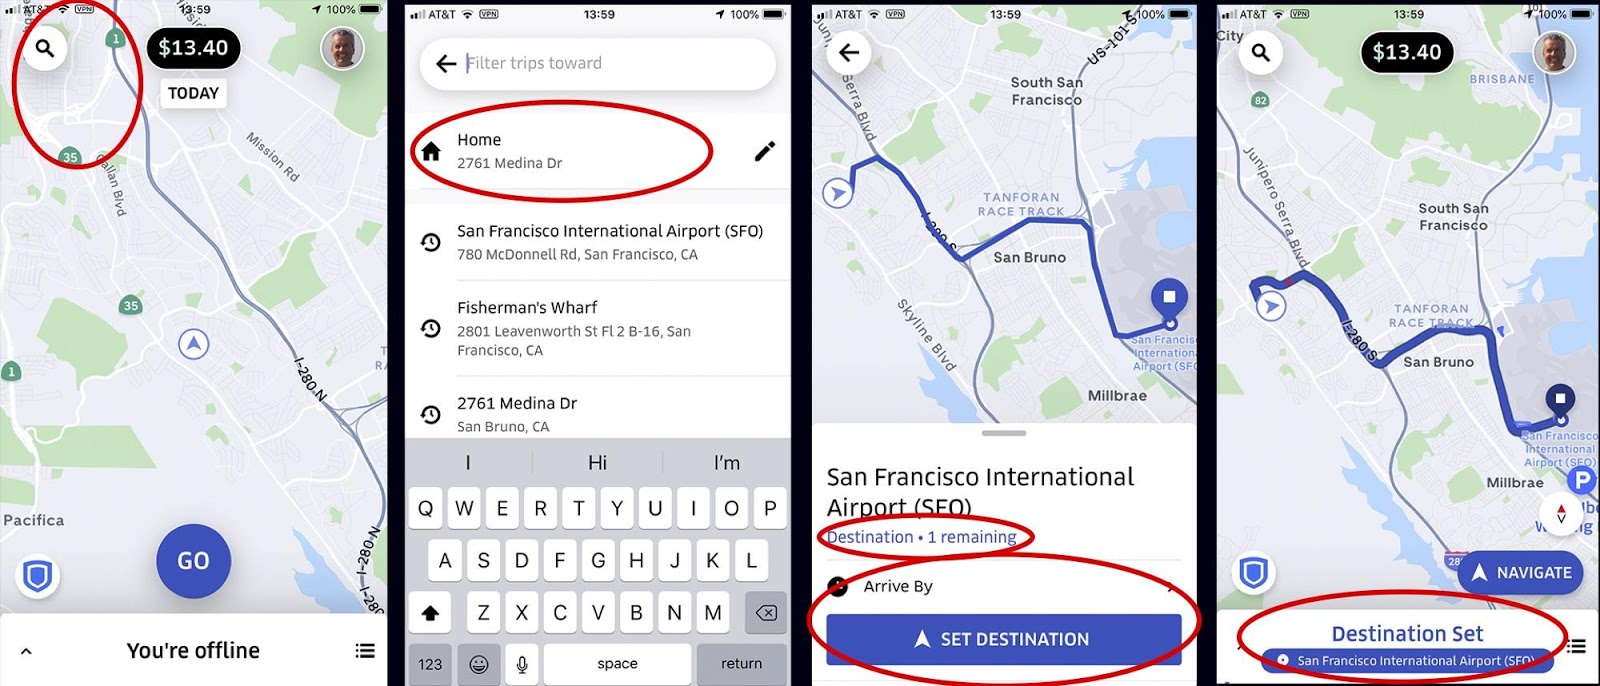
You can only pre-populate your Home setting. However, the app will also list your past several destinations. My recommendation here is that you absolutely use both of your filters each day.
I usually use both of mine in the morning to secure a long trip to the airport. I don’t know for a fact, but it seems that destination filter requests get some type of priority. In other words, the destination filters seem to work very well. You will make more money on long rides, so use the destination filters to get long rides.
Here’s a video on how to use and set up your destination filters:
#5: Change Your Metrics
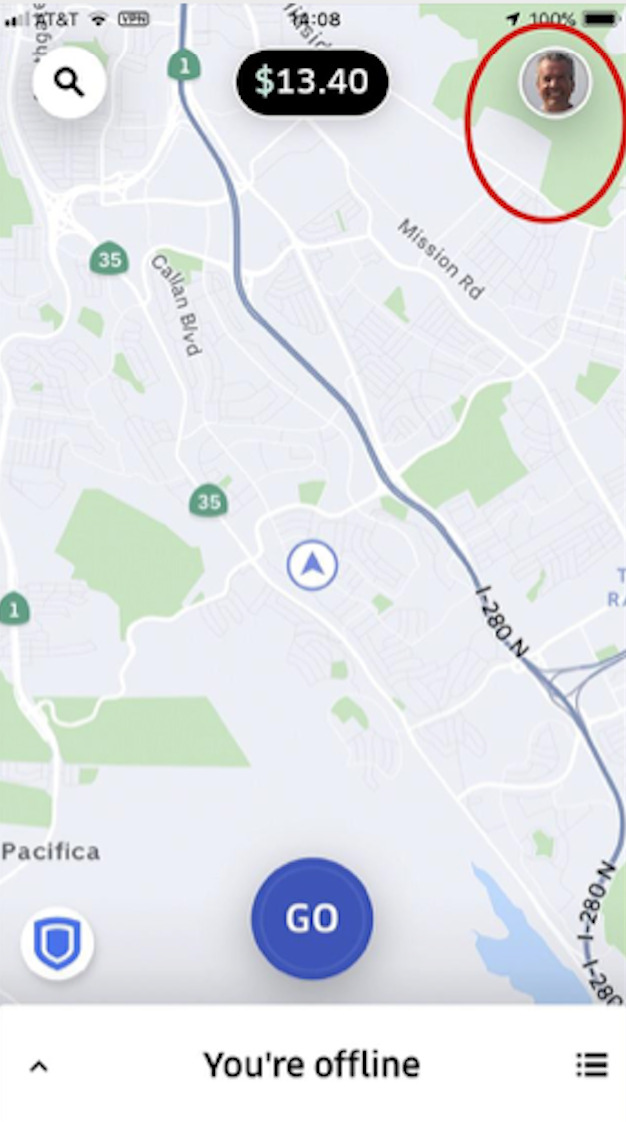
At the top center of the home screen, Uber displays a metric, usually your earnings for the day. However, you can select one of four metrics. Your choices are: Earnings from your last trip, Earnings for the day, Progress toward your Quest bonus, and Uber Pro points.
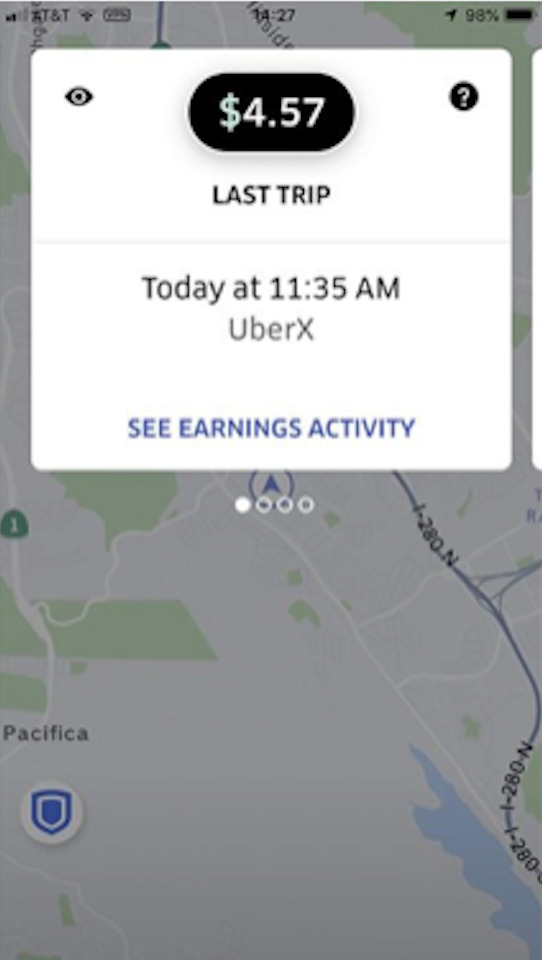
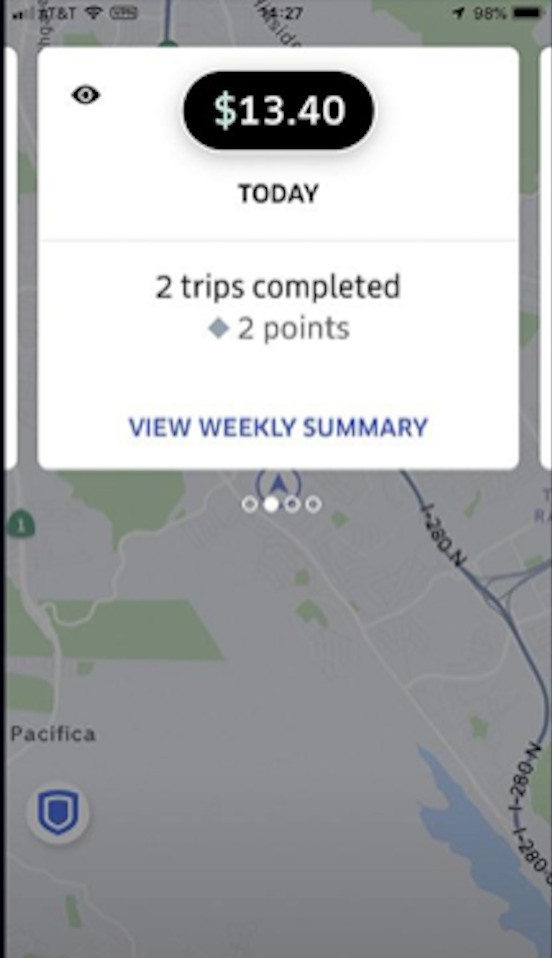
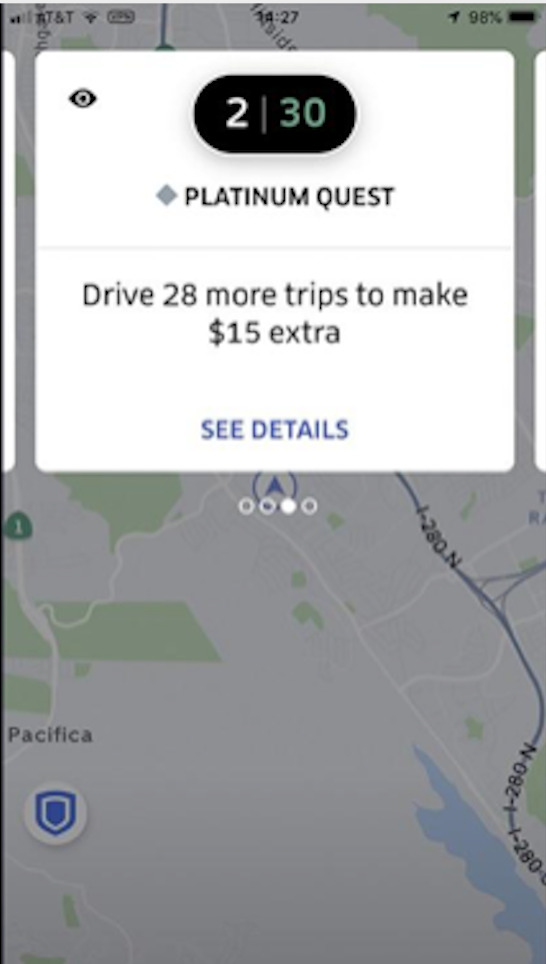
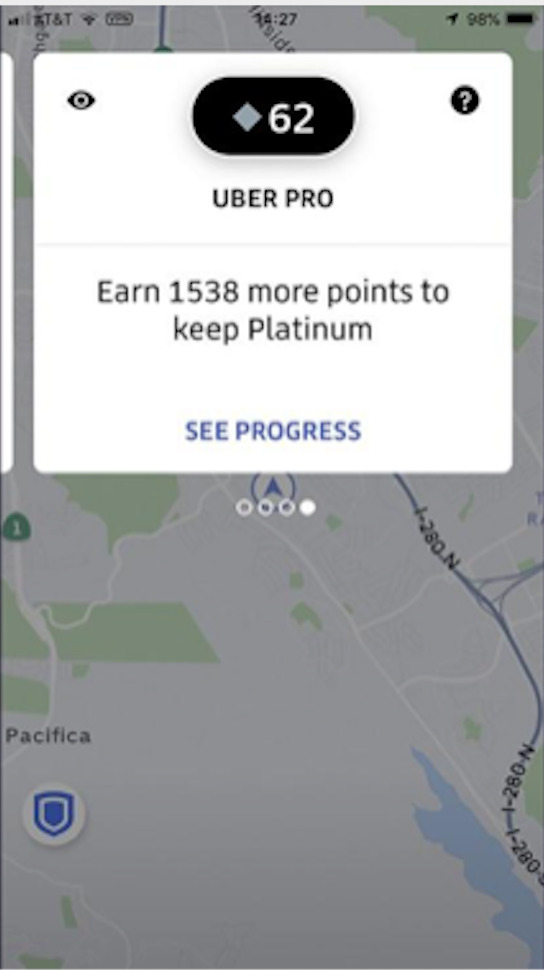
To make a change, or to see all your options, tap on the metric and then slide from one window to another. When you are at the metric you would like to have displayed, tap on the metric again and the window will slide up.
This was one of the features Harry liked most when Uber launched the new driver app:
#6: Use the Final Ride Feature
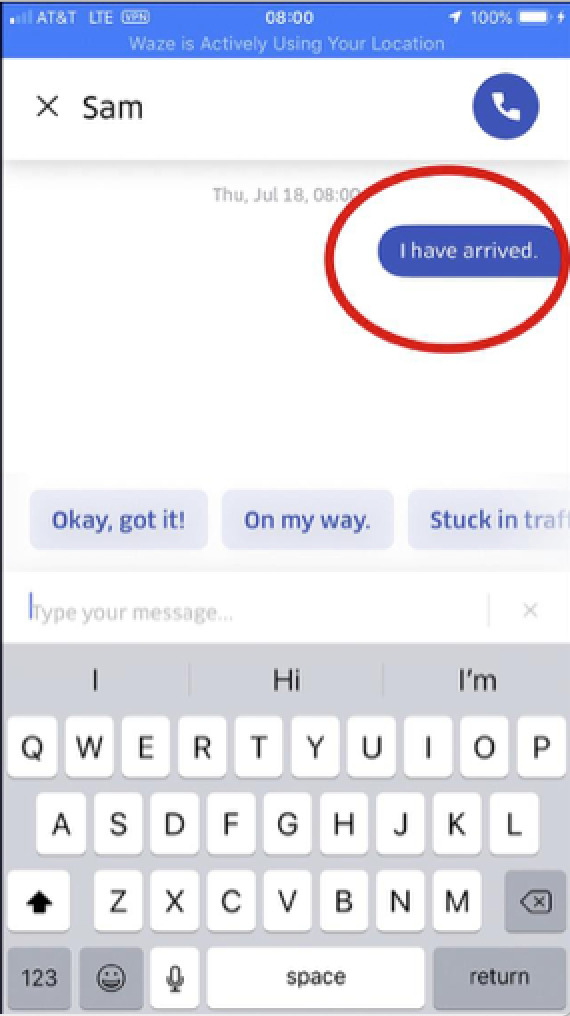
This feature comes in really handy. Often throughout the day there will be times when you are either ready for a break, or you need to go offline so that you can reset your app. For example, you may have taken a passenger on a long ride and now you need to set up your destination filter to return home before you go back online.
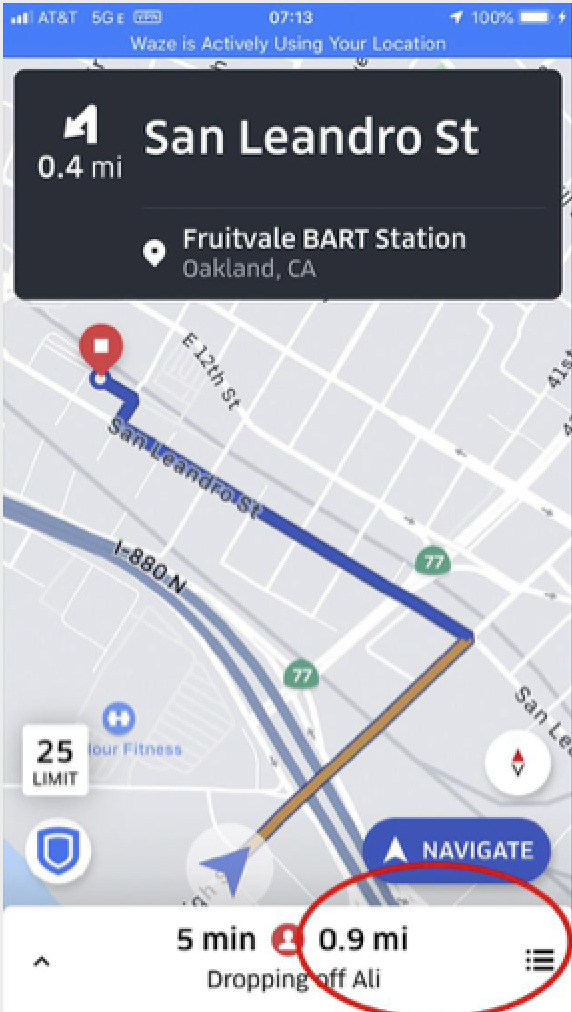
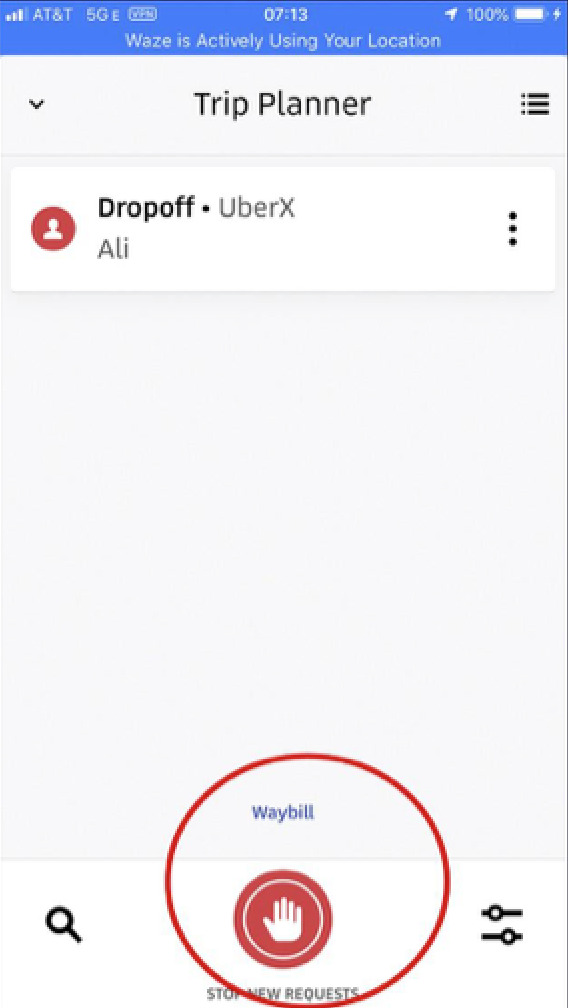
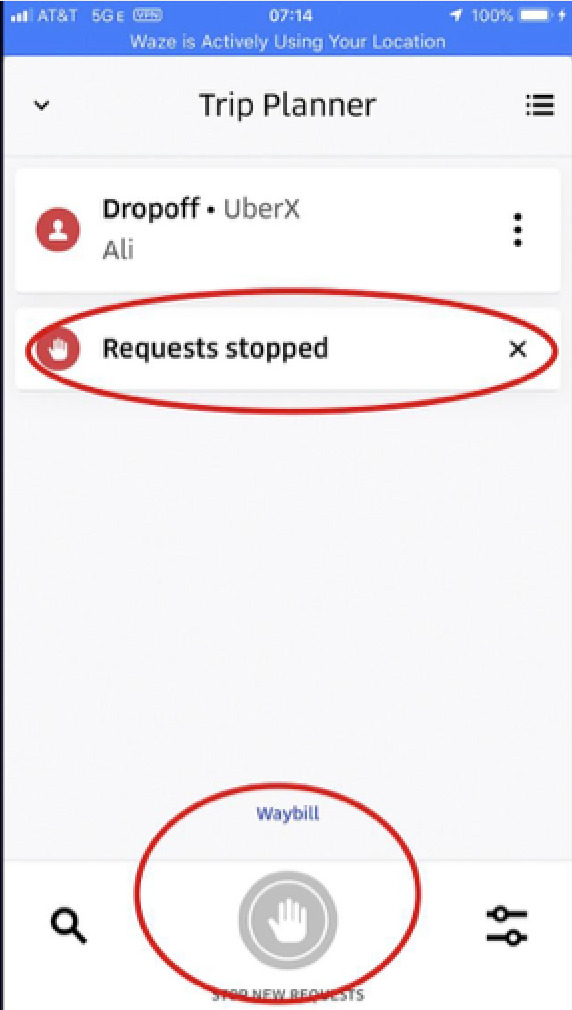
Bring up the trip planner screen by tapping on the 3 lines in the bottom right corner. Then tap on the white hand in the red circle. As you can see in screenshot #3, the red hand turns grey and you will be put offline once you complete your current ride.
#7: Change The Trip Destination While Driving
Sometimes you may be driving a passenger and he or she will need to change the destination. Most passengers know how to do this. However, some do not.
Recently, I was driving an older couple to the airport for a one month trip to Germany. About half way, the man realized he had forgotten his laptop. I immediately began to turn around, but I did not remember his address and he could not figure out how to change the address.
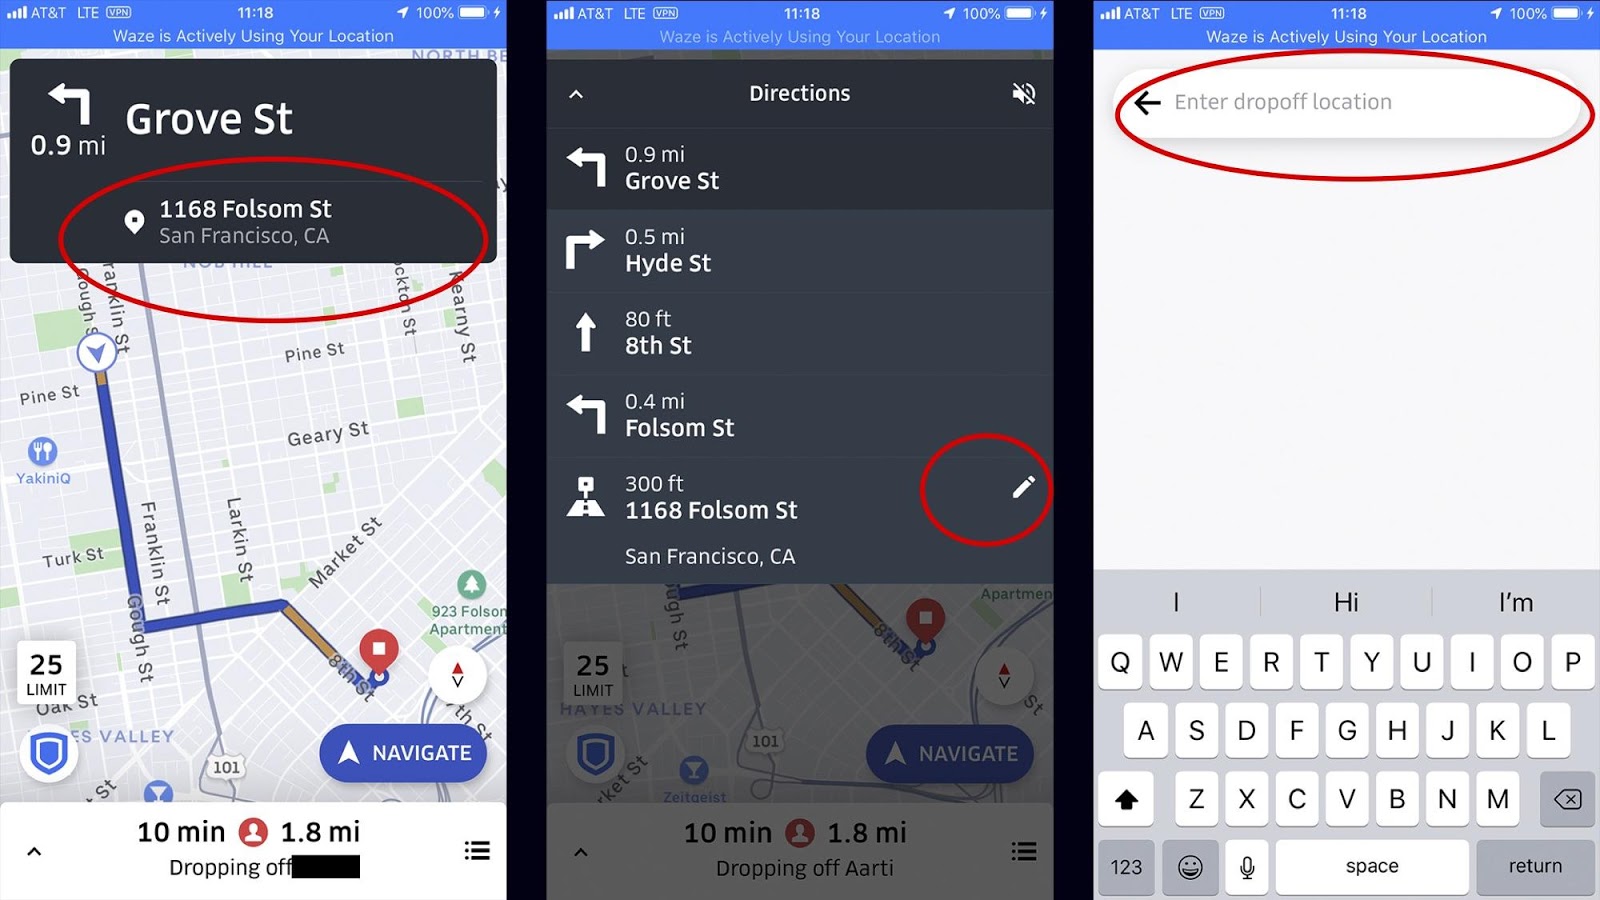
Screenshot #1 shows us the home screen when you are driving a passenger to his or her destination. Tap on address which will take you to the second screen. As indicated, tap on the pencil icon and then you can type in the new address.
It is really very simple, but if you have not done it before, it may seem more difficult than it is. The other thing I did was set this ride to be my final ride. This way I would not get assigned another ride when I arrived at the passenger’s home.
While the passenger ran into his house, I changed the destination back to the airport. Once we were back on our way to the airport, then I removed the final ride designation.
Need to add more stops to your ride? Here’s how passengers can add more stops to their ride:
#8: Cancel Individual Pool Riders
Sometimes you cannot take another Pool passenger. This most often happens on airport runs in which all the trunk space is taken. If I don’t have room for any more passengers, I need to cancel all new ride assignments I get.
Further, even if you select the final ride designation, that will not stop Uber from assigning more passengers to your Uber Pool trip.
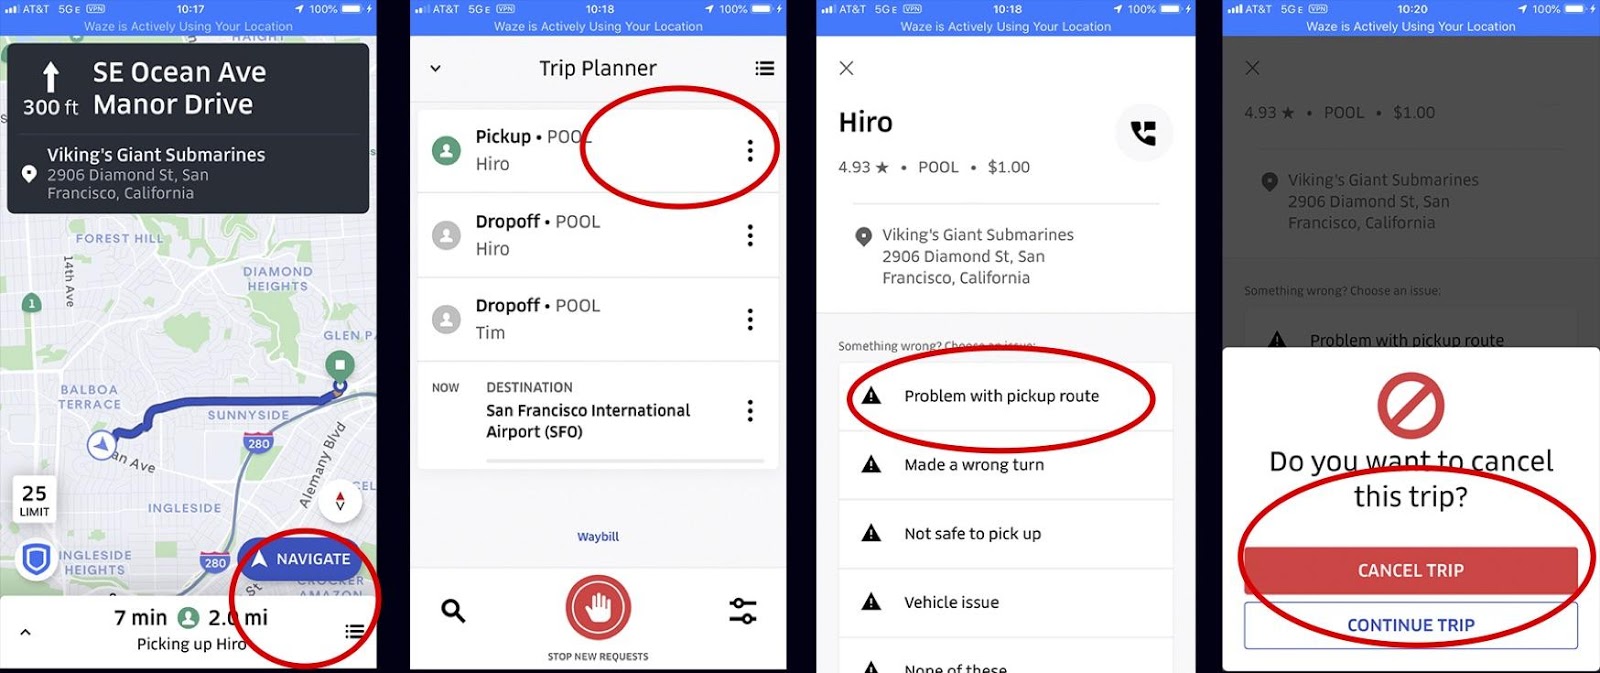
Open up the trip planner. Then next to the passenger you will want to tap on the three vertical circles as shown in screenshot #2. Next, you will need to select a reason. If you don’t like any of the listed reasons, you can select “None of these” at the very bottom. This will open up the final screen in which you tap on Cancel Trip. This will cancel the individual passenger and you can continue on with your trip.
Key Takeaways
This Uber app is a wonderful tool for drivers. The more you dive into it, the more little Easter eggs you can find.
This article has shared and provided detail on how to use the app to make your job simpler, more time-efficient, and more profitable. Did I forget anything? Let me know. Have a great day and be safe out there.
-Jay @ RSG