Are you driving a new (or new to you) car for rideshare? If so, you want to make sure it’s rideshare ready! Senior RSG contributor Jay Cradeur shares his best tips on getting your car ready to go for Uber and Lyft driving below.
Whether you’re a brand new driver getting ready to take your first trip, or a veteran rideshare driver like me who just purchased a new car, one thing you will have to do is get it “rideshare ready.” I recently shared all about my experience of selecting and purchasing a new car.
Ultimately I purchased a black 2017 Honda Accord Hybrid. That is not the end of the story. In order to drive your new car for Uber or Lyft, there are still five tasks you need to complete to be ready to take on passengers. Let’s break it down.

Task #1 – Get Rideshare Insurance
If you are going to be a rideshare driver, you need to get rideshare insurance since it will protect you during all phases of your driving. Uber and Lyft will cover you when you are driving to pick up a passenger and when a passenger is in your car but even with Uber and Lyft’s coverage, you still are going to have to contend with very high deductibles. Uber has a $1,000 deductible and Lyft has an astronomical $2,500 deductible. Some companies like State Farm though will actually allow you to use their rideshare insurance (and likely lower deductible) if you get into an accident during Periods 1-3.
A regular personal policy will cover you when you are not driving for either company. However, when you are driving around waiting for a ping, you are very vulnerable.
Furthermore, if your personal insurance company finds out you are a rideshare driver, they will more than likely drop you and not provide coverage if you are in an accident. The bottom line is, for sound financial reasons as well as peace of mind, get rideshare insurance.
Next, I rented a car through the Fair car rental program. As part of the $201 per week fee, my car was fully insured with a $1,000 deductible.

With my new car, I contacted Geico because I have used Geico in the past, and truth be told, I like working with a company that has a lizard as its spokesperson. I first contacted Geico to get a personal policy first since I would not be driving for Lyft or Uber when I first got my car. I also wanted to be able to compare the price of a regular insurance policy and a rideshare policy.
You can find more options for rideshare insurance at our rideshare insurance marketplace.
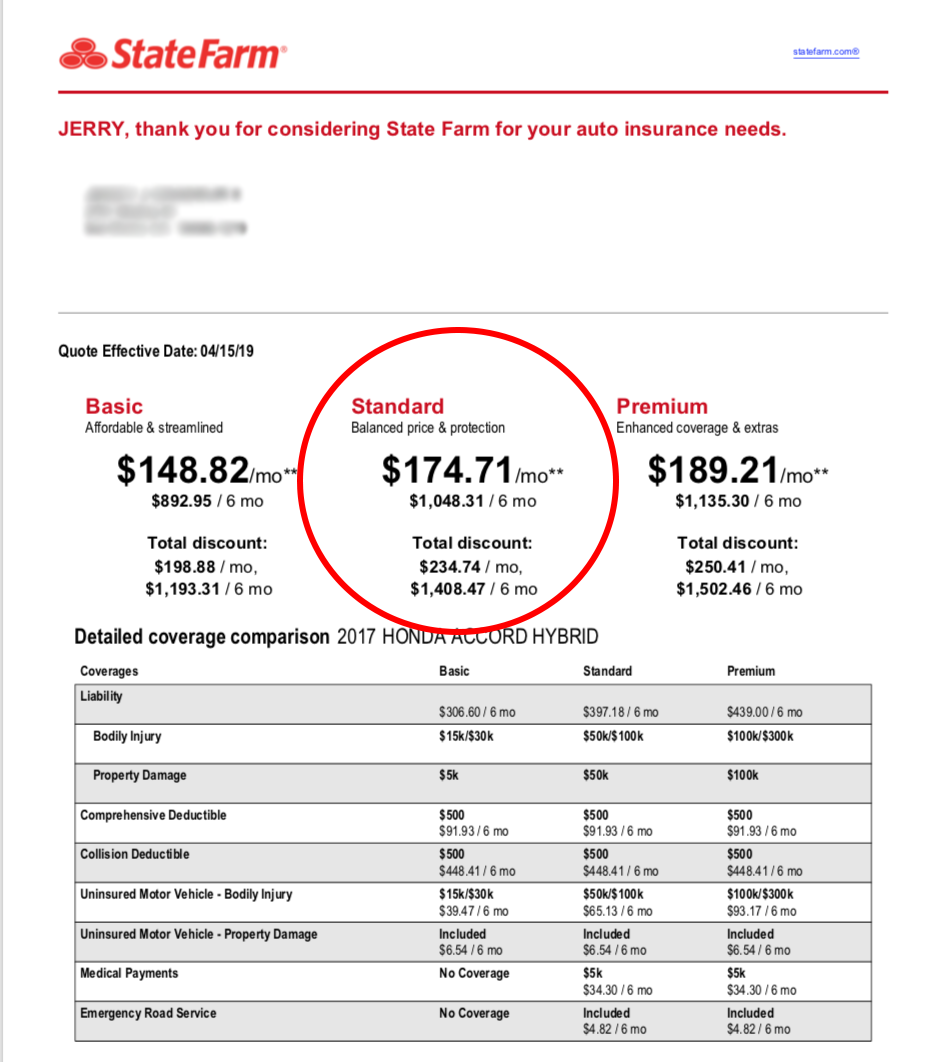
My quote for a personal policy with a $500 collision deductible was $175 per month. I also went online and got a quote from State Farm and the amount was very similar.
After that, I contacted Geico and asked for a rideshare quote. I had to answer a few questions, including:
- What did I think the average trip was in length, one way? My answer: 2 miles.
- How many days do I work? 5 days.
- How many trips do I do per day? 15.
While my answers are conservative, they are accurate given my reduced workload this year. I was very pleased to hear that my annual fee for rideshare insurance with a $500 deductible for all my rides was $1,600 or $135 per month. My rideshare policy, providing the same coverage, was less expensive than my strictly personal policy. I said: “Sign Me Up!”
Related: Lyft and Geico Partnering to Offer Drivers Rideshare Insurance
Task #2 – Upload Your Documents
Now that you have your car insurance, you will need to upload your car information to Uber and Lyft. Both apps make it easy to add a vehicle.
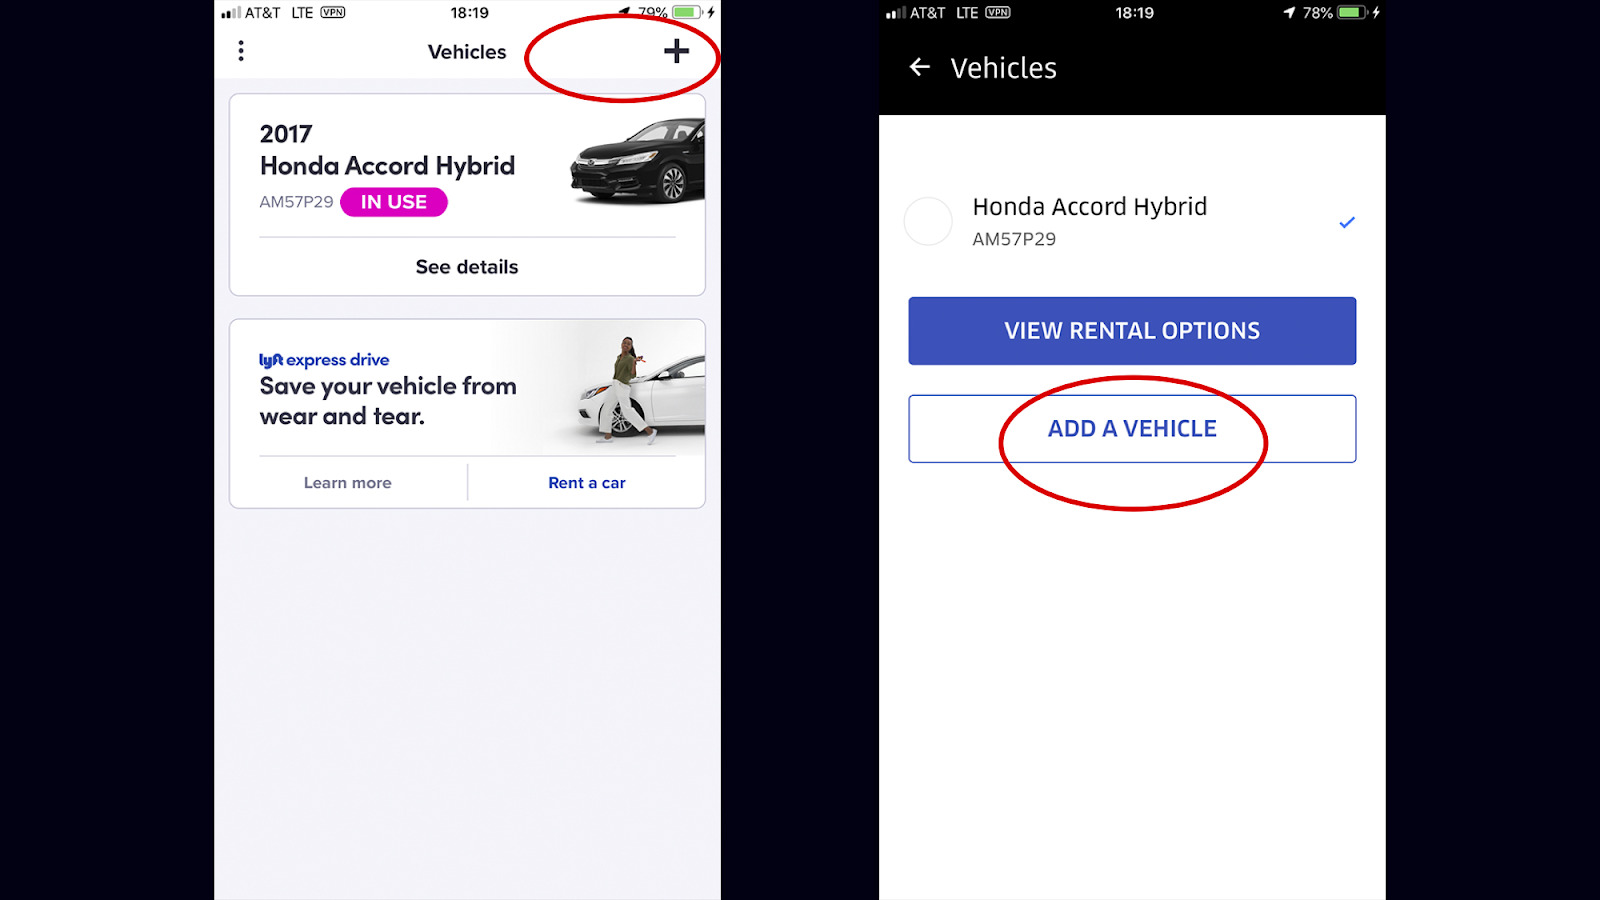
With Lyft, you click on the + in the upper right-hand corner of the vehicle page. With Uber, you click on “Add Vehicle.” Then you will need to upload your registration and insurance documents. Both companies will review the documents and approve within a few hours.
You will see the status go from Pending to Approved.
Ad: Use this Fetch Rewards referral code to save money on all of your grocery purchases.
Task #3 – Get Your Car Inspected / Pick Up Trade Dress
You will need to get your car inspected in order to drive for Uber and Lyft. I happen to be in a market in which I have both an Uber hub and a Lyft hub within 10 minutes of each other.
Find an Uber hub near you / Find a Lyft hub near you
I went to Uber first and after a 10-minute wait, got my car inspected. I requested a paper inspection so that I could upload the document to Lyft to speed up the process and avoid two separate inspections.
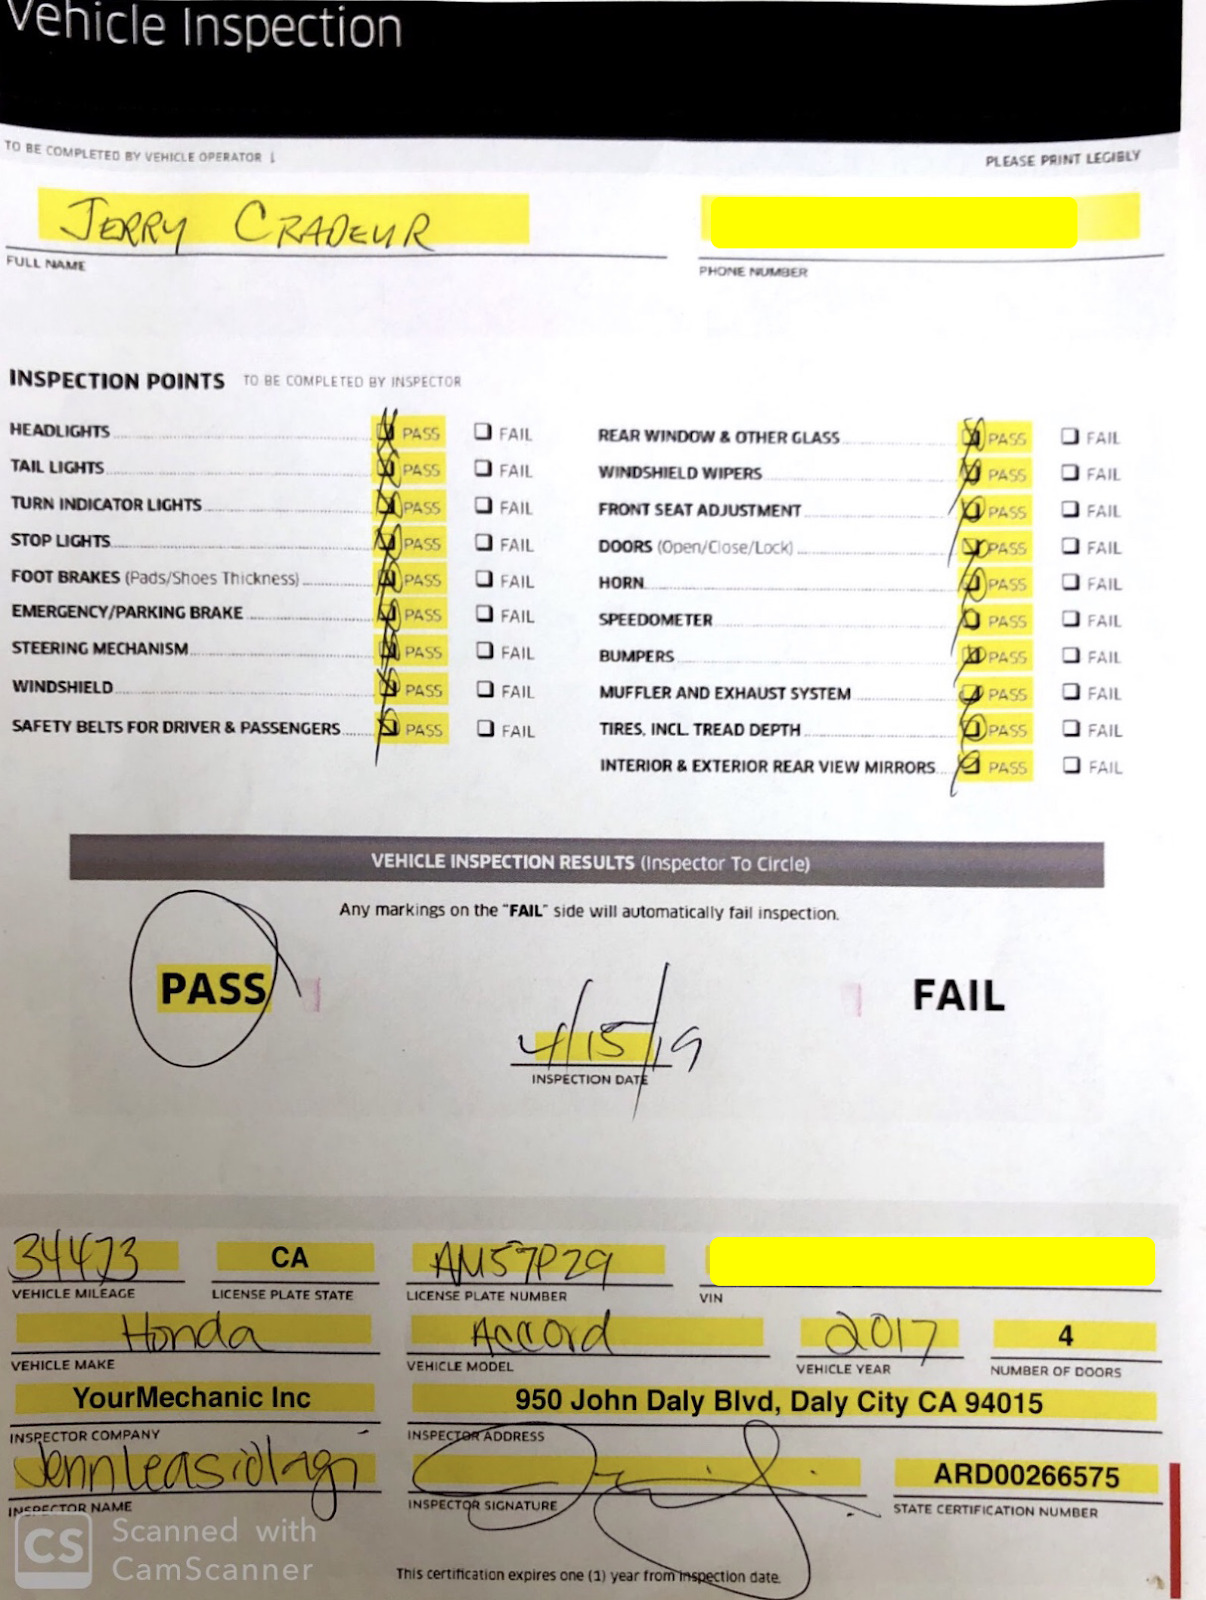
After getting my paper inspection form, I headed inside to pick up the required trade dress (Uber sticker that goes on the windshield) and an airport placard. While I was there talking to a live Uber person, I also asked her to delete my old cars which she was happy to do.

Next, I was off to Lyft. I met with a Lyft person and showed her that I had uploaded the inspection form. She approved it right there. She also provided me with two Lyft emblems, one new Amp (the lighting device that goes on your dashboard), and another airport placard.
Related: How to Get Free Vehicle Inspections for Uber and Lyft Drivers
If you’re looking for ultimate convenience, you can also use a virtual service like Rideshare Mechanic (affiliate link) to get it done. This is a pretty cool concept since you’ll do a video chat with a mechanic from the comfort of your home and have a signed inspection form in just minutes.
Task #4 – Apply Trade Dress
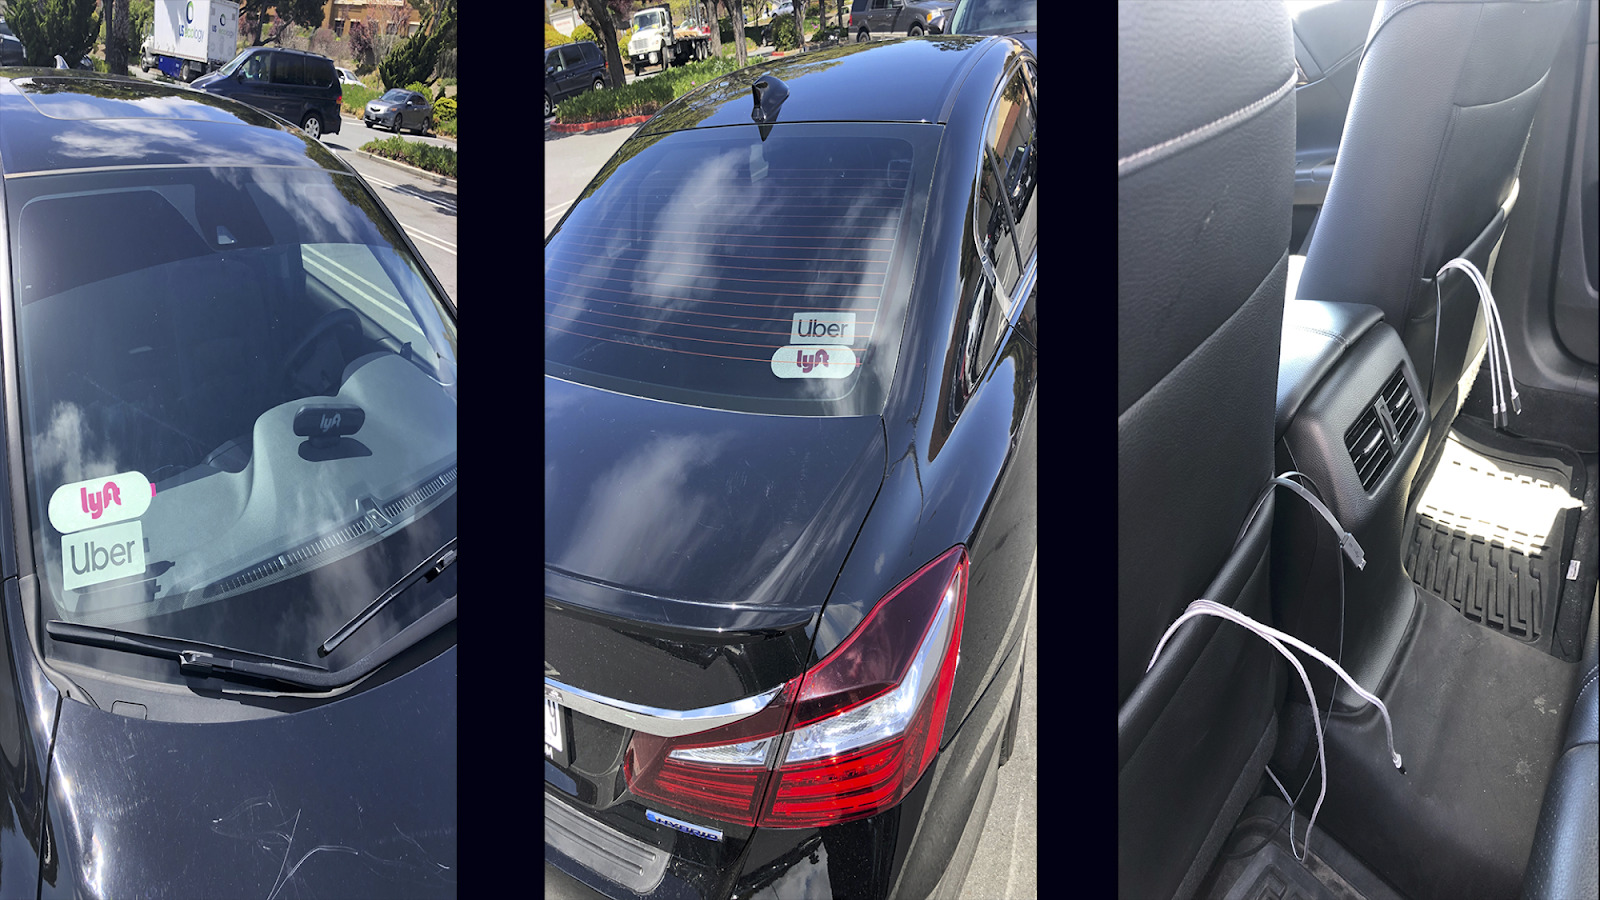
This part is fairly easy to do. You will need to put your stickers on both the front lower right of your windshield and on the back lower left (facing backward) of your back windshield. Since I have tinted glass, the woman at Uber told me I should put a sticker on the outside of the back windshield.
That does not work for me because I don’t want anything on the outside. I put it on the inside and you can see it OK. I also set up the Lyft Amp on the front dashboard. When I am not driving for Lyft, the Amp goes in the glove compartment.
Task #5 – Prepare Your Car For Passengers
I feel it is essential that you provide your passengers with a few basics. And I mean the very basics. I don’t even offer water any longer. All I provide is tissue and phone chargers.
Looking for the best car accessories for drivers? Check out this list of the best car accessories according to drivers!
I offer quite a few phone chargers. I have two for Apple and two for Android.
I do this for a couple of reasons. First, it is very helpful if you have a car full of passengers. Second, when people get in my car and see all the chargers, they feel as if they are in the care of a professional. I am still surprised by how many people comment about all the chargers. Impressed passengers tend to tip better.
You may need some lighter converters and some extenders to make it all work. You can get those through Amazon or at a store such as Best Buy.
Summary – Go Out And Drive
I am excited to go out tomorrow and drive. All my apps are set up. I am fully insured so nothing to worry about. My car is clean and fully stocked. I am ready to go.
One thing I did not mention but was definitely a part of the day’s activities is a good thorough car wash. If you bought a brand new car, you obviously don’t need a car wash. My car is a used car and it needed a good going over. Keep it clean. Your passengers definitely notice the cleanliness of you and your car straight away.
Have a great day out there. Smile and be safe.
Drivers, how did you get your car rideshare-ready?
-Jay @ RSG